The best channels at your fingertips
Scan nearby networks to find the least crowded WiFi channels and boost your connection instantly.
Choosing the best WiFi channel is key to unlocking the full potential of your WiFi, and we’ll explain how you can do just that using NetSpot WiFi channel Scanner.


There are many factors that influence the performance of a WiFi network, but you would be hard-pressed to find one that’s as easy to change and has such a big impact as your WiFi channel. Changing it is a matter of a simple click, and you’ll be glad you took the time to make it.
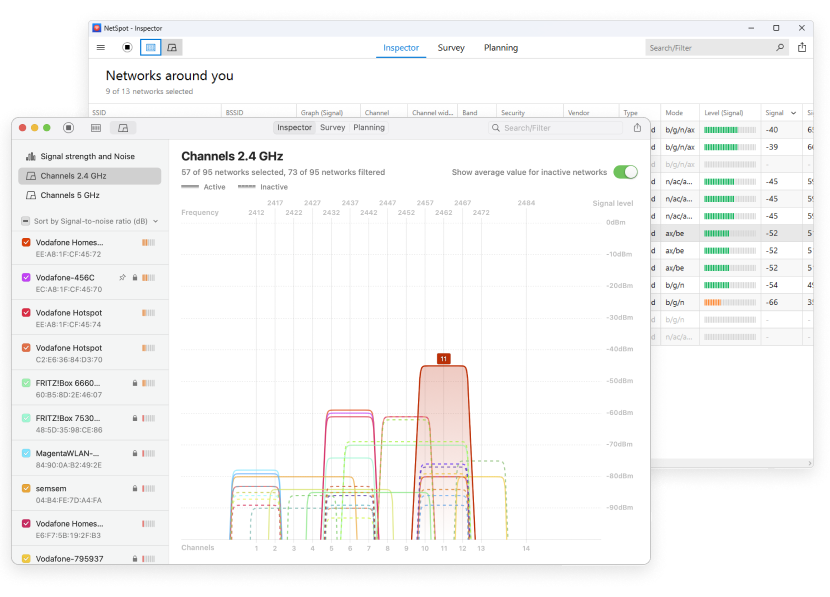
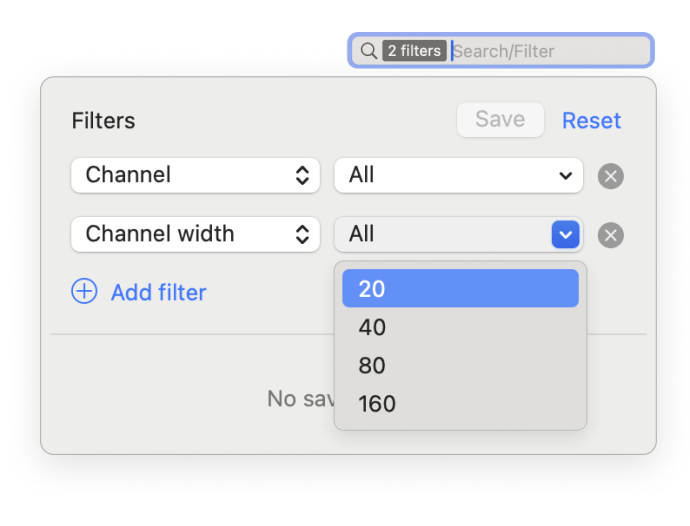
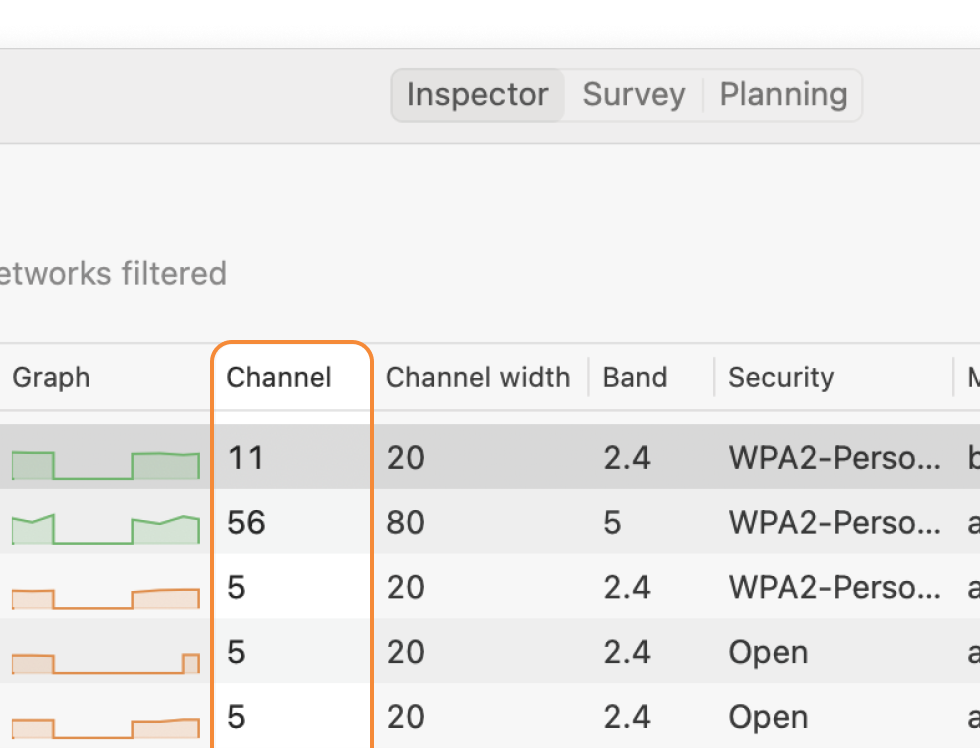
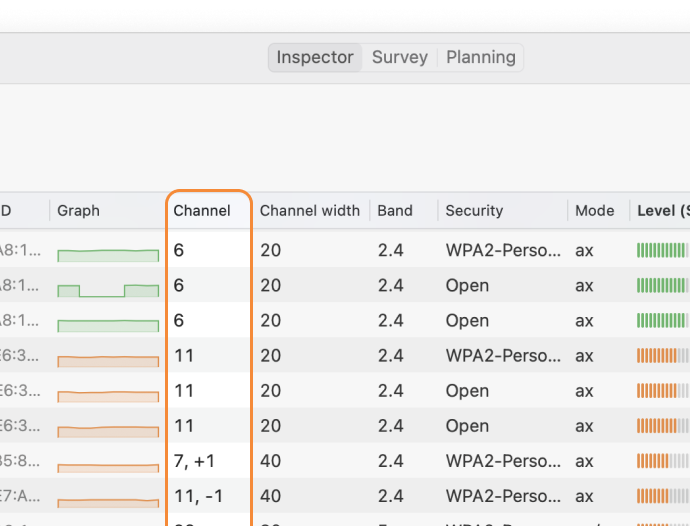
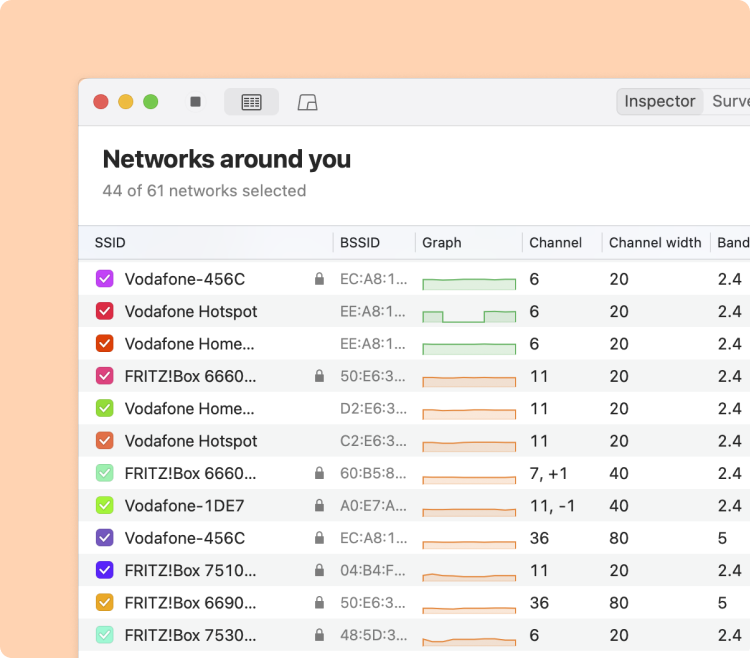
Launch NetSpot and make sure Inspector mode is selected. Inspector mode not only allows you to see detailed information about networks, including the channel, channel width, frequency band, and other vital network characteristics. This overview helps you identify the optimal channel to minimize interference.
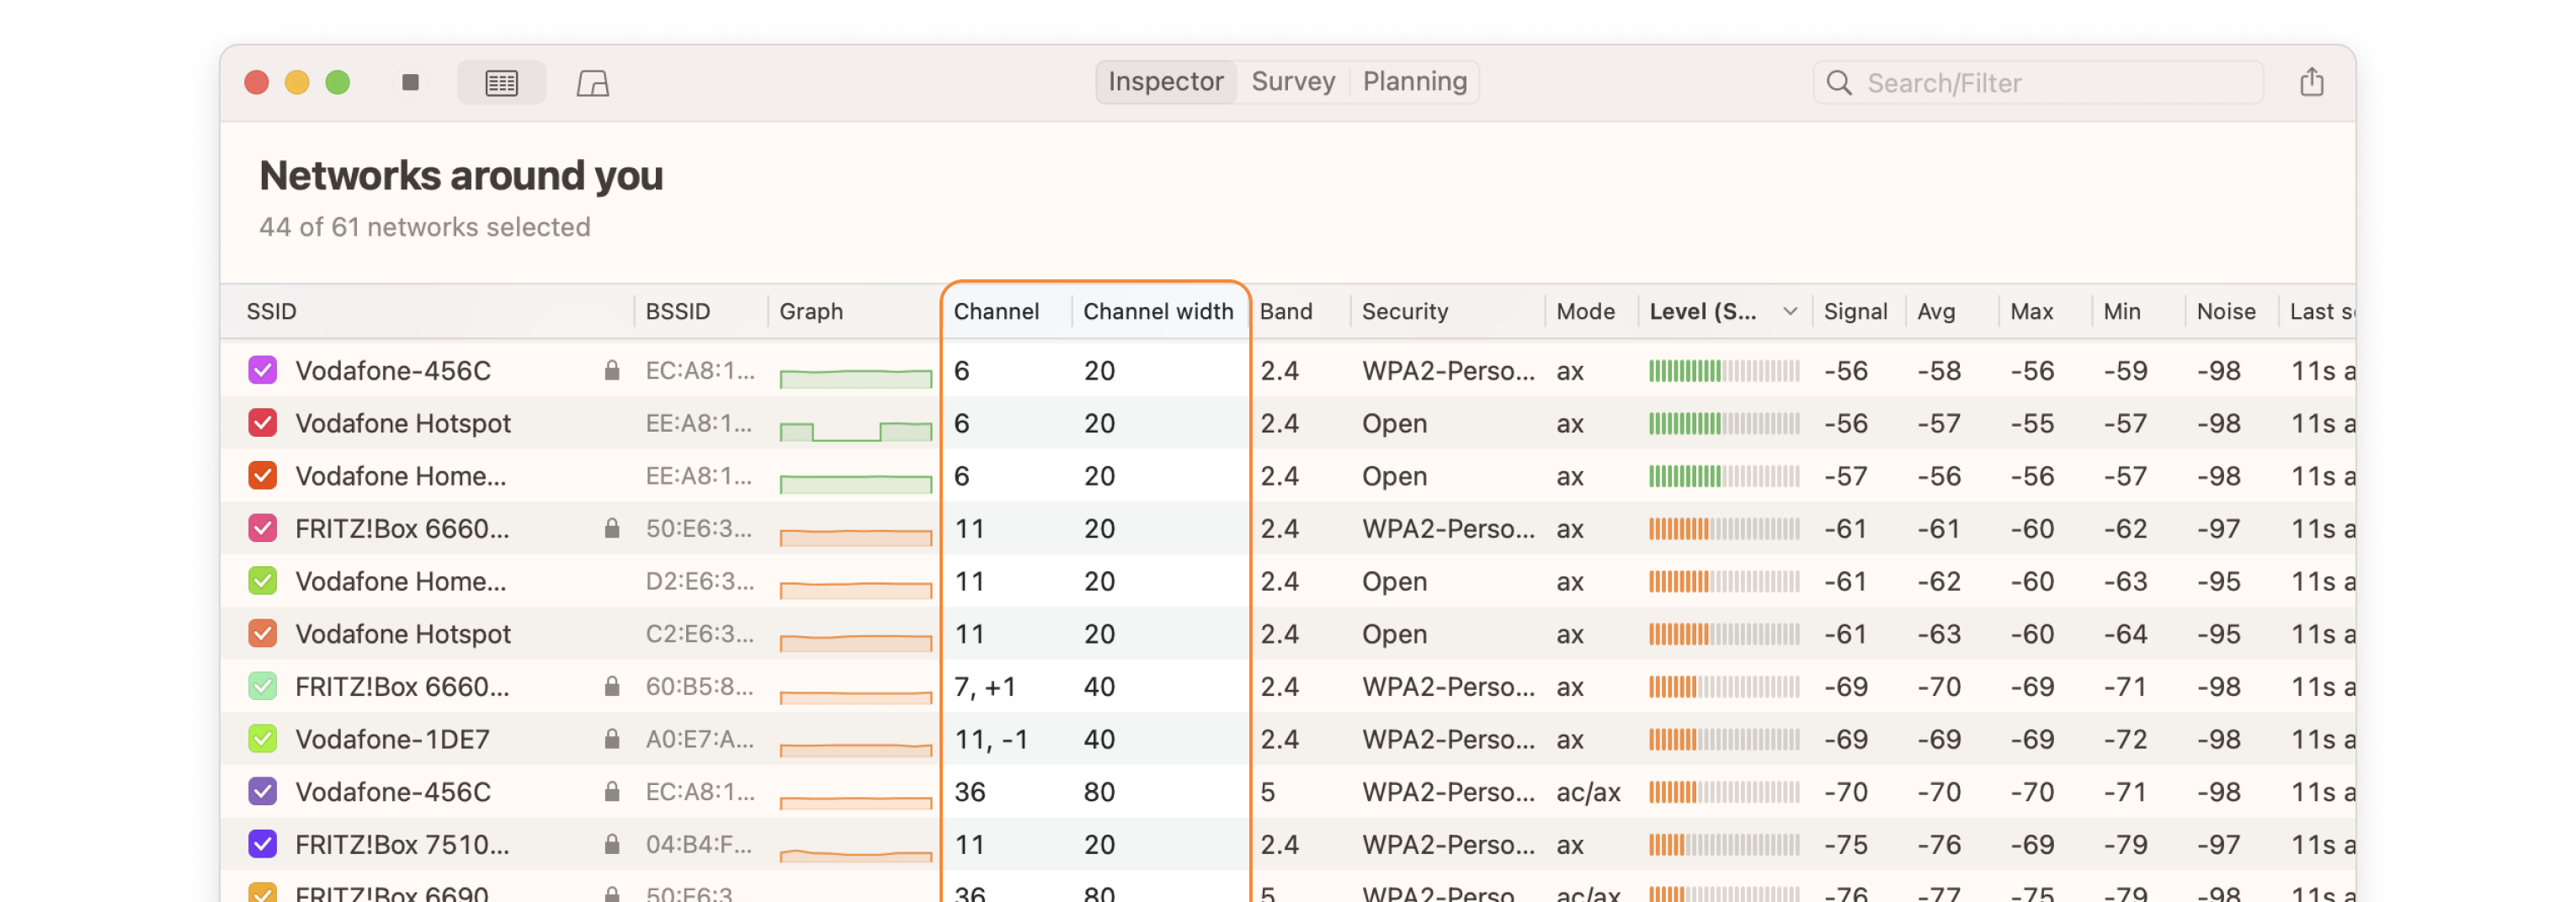
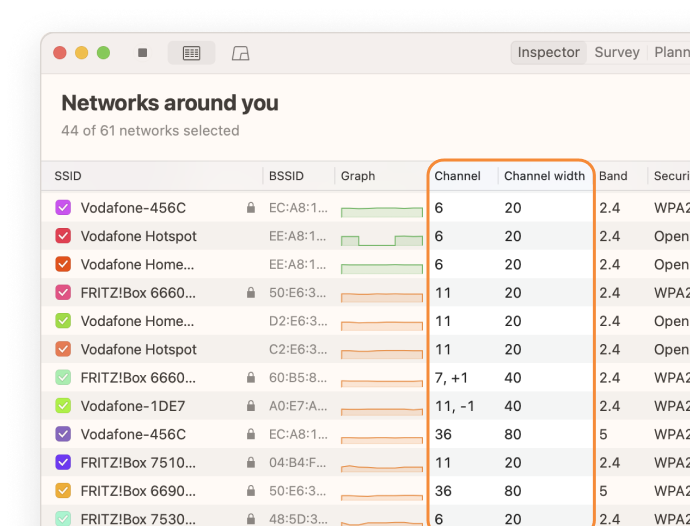
The sorting feature helps quickly find the optimal channels or identify problematic networks. This is especially useful for those who don’t want to spend time manually analyzing a long list of networks. You can also sort by signal strength or band, providing a comprehensive view of your network environment.
Determine which non-overlapping channel (1, 6, or 11) is used the least. Pay attention to the signal strength of nearby networks — a neighboring network with a strong signal can still cause interference.
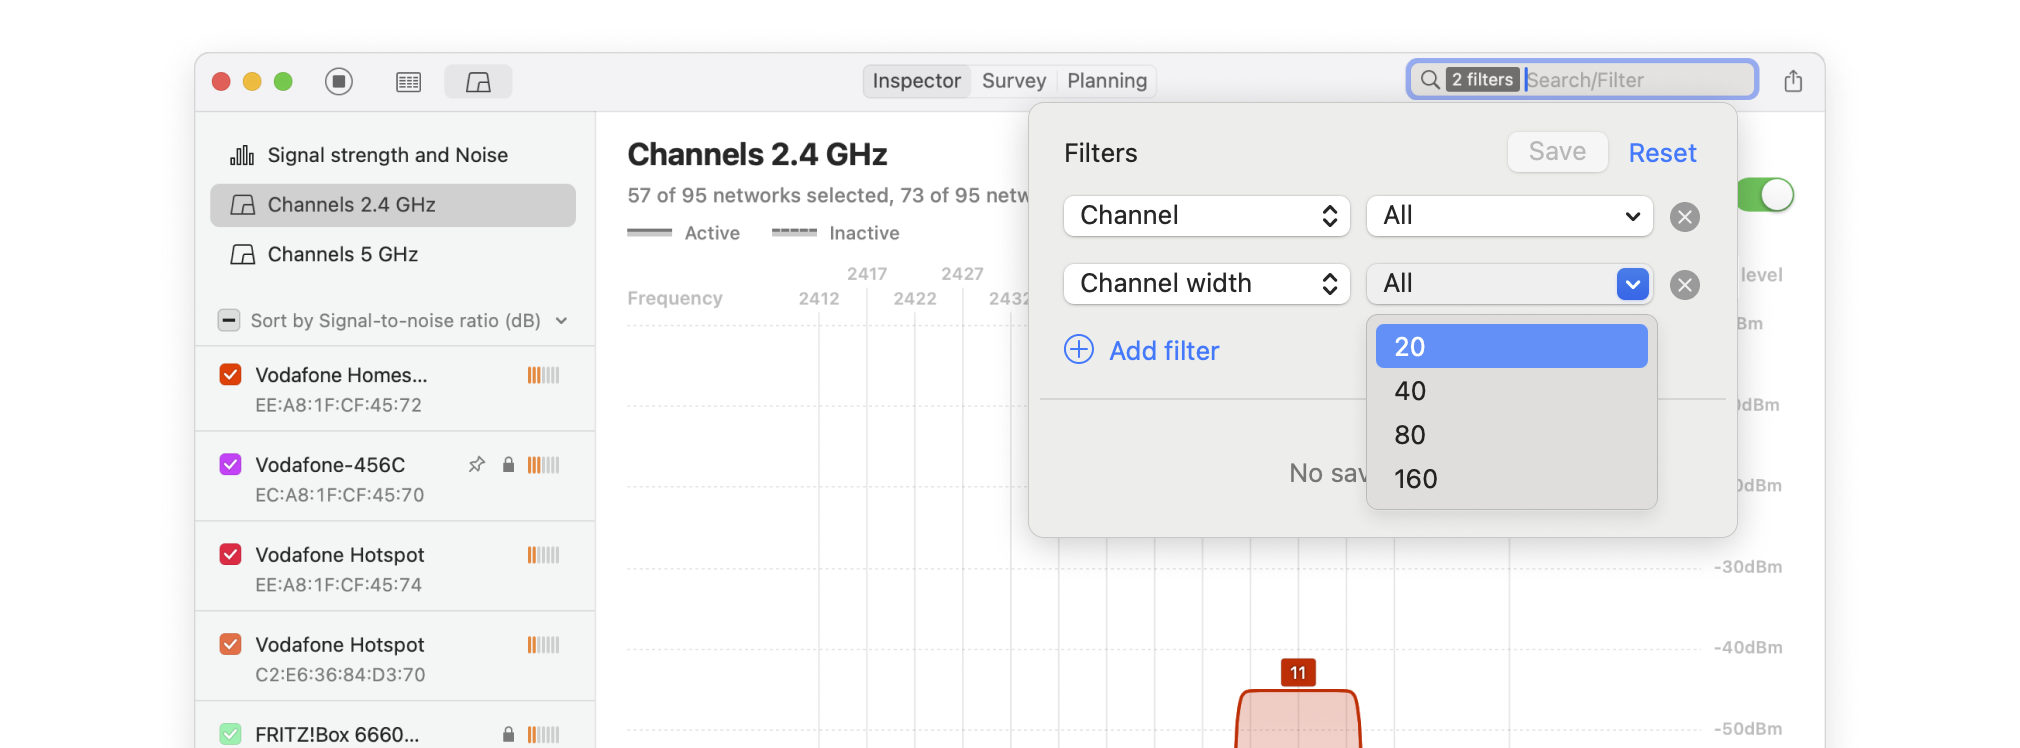
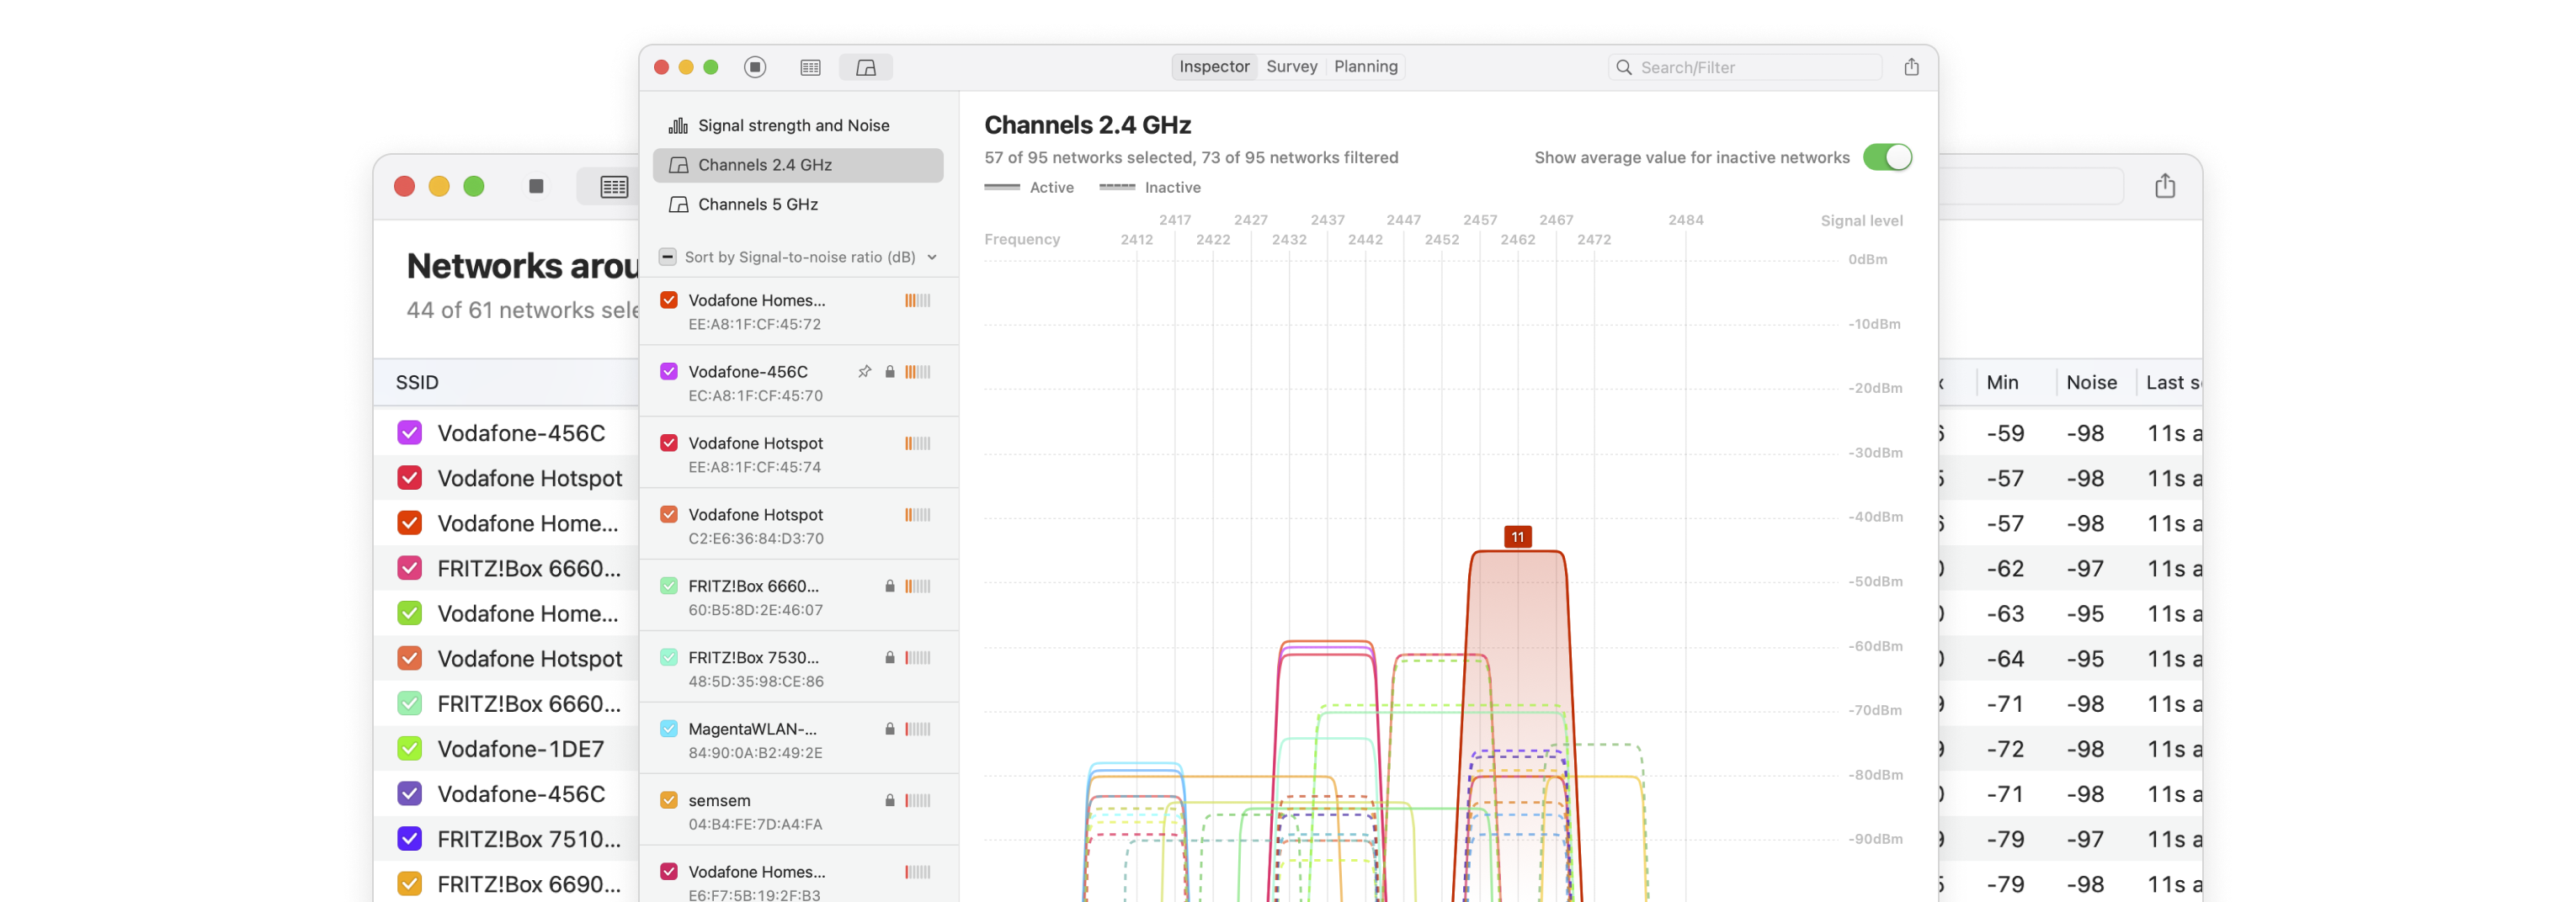
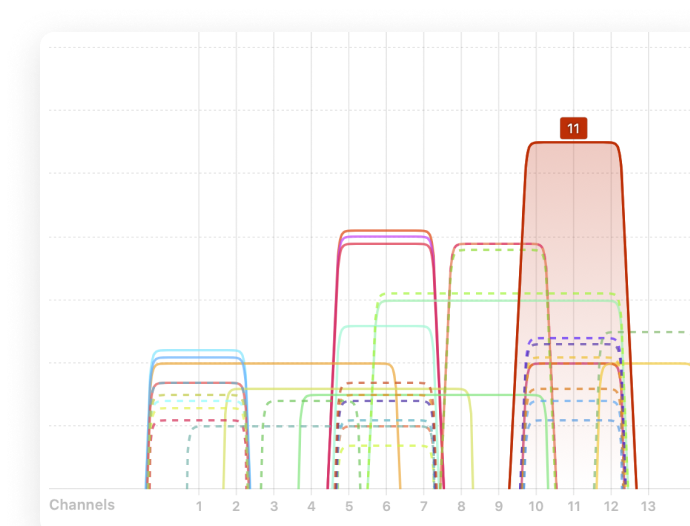
Select all WiFi networks you want to analyze. Click the “Signal level and noice graphs” button at the top left of the app window. Switch to the Channels 2.4 GHz, 5 GHz or 6 GHz tab to see which networks are overlapping. The channel overlap graph is an invaluable tool, visually representing which networks are competing for the same channels.
Scan nearby networks to find the least crowded WiFi channels and boost your connection instantly.
With NetSpot, identifying channel interference is fast and visual. Spot overlaps on your heatmap and switch to cleaner channels in just a few clicks.
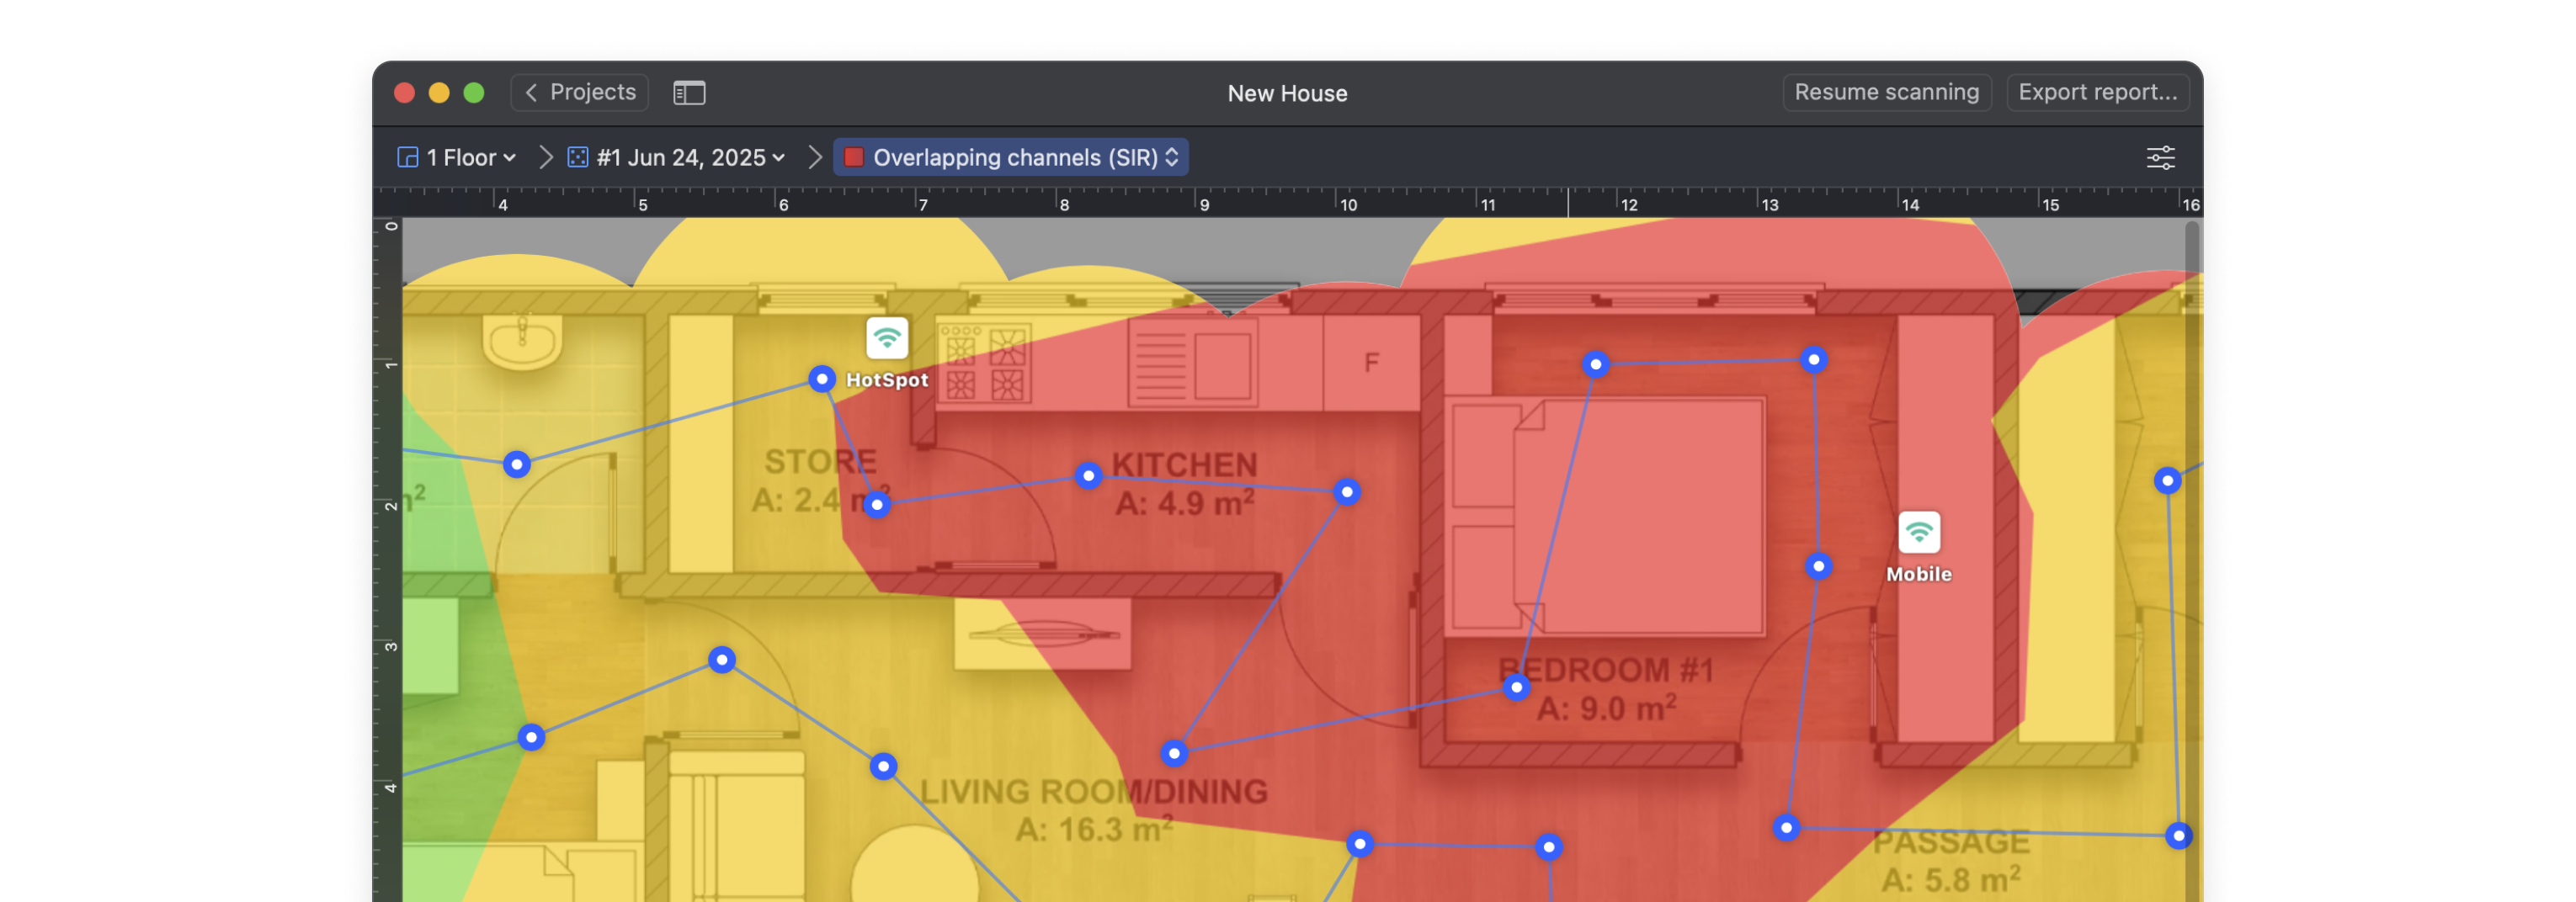
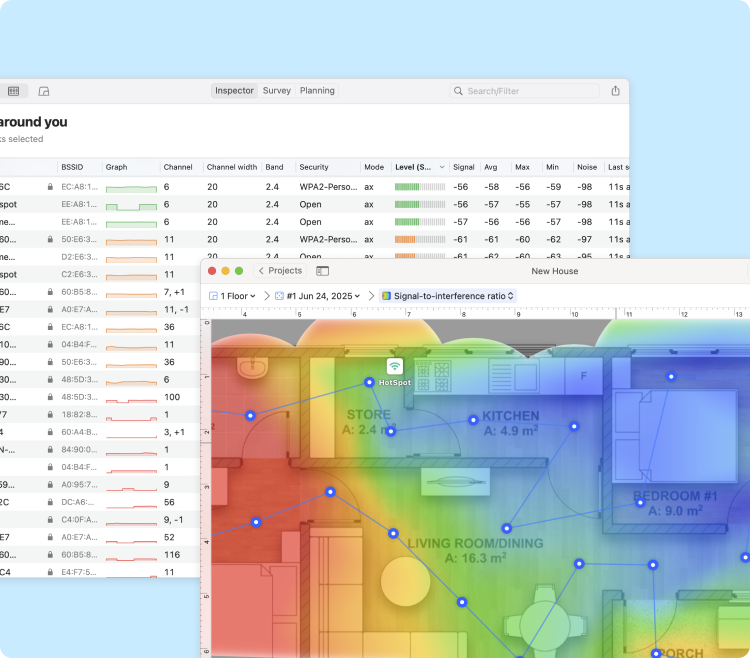
Switch NetSpot into Survey Mode and start collecting data across your space. Survey Mode instantly paints your floor plan with a color-coded heatmap that shows, at a glance, where each channel dominates, where they collide, and where the signal trails off — making it effortless to size up overlapping channels across the entire survey area in seconds.
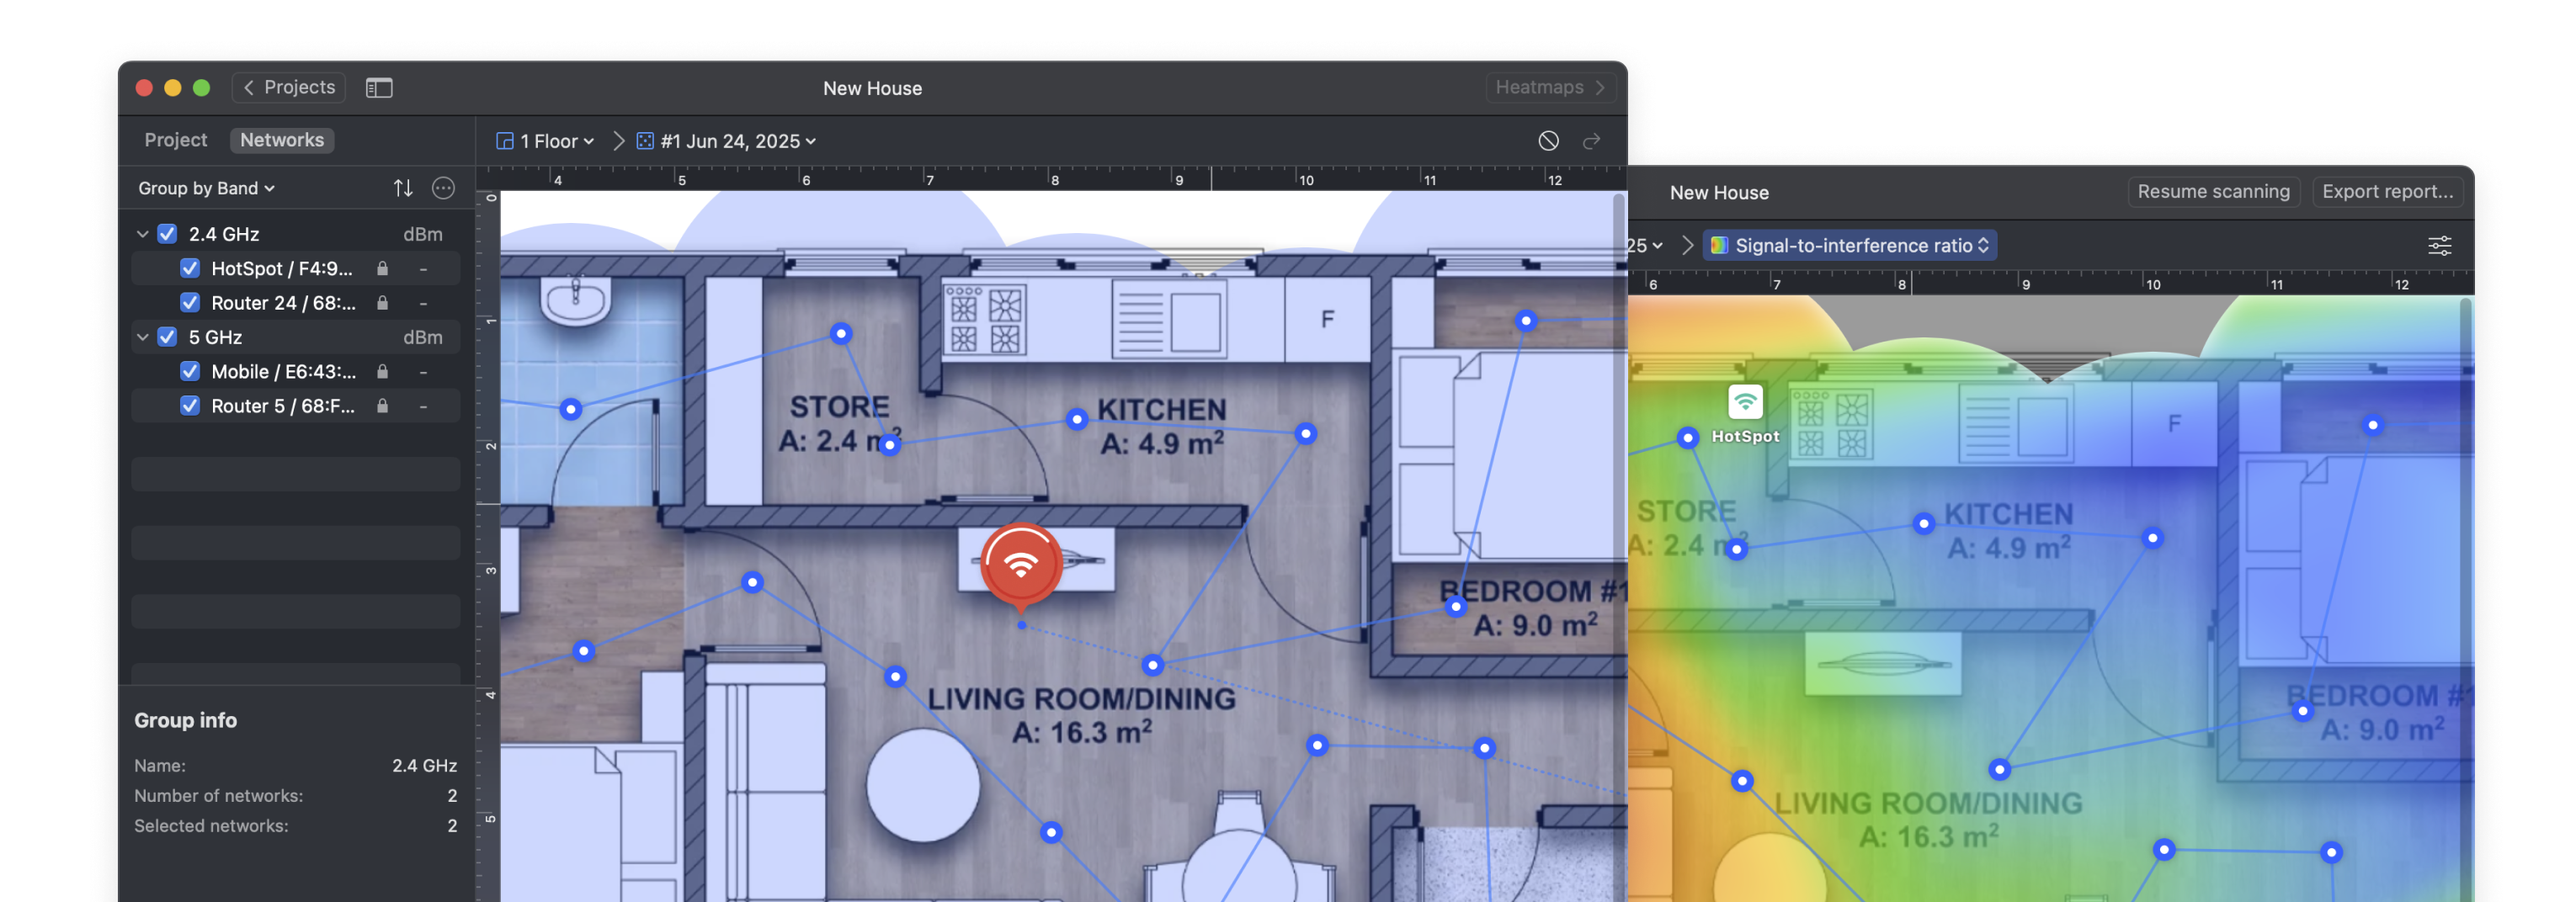
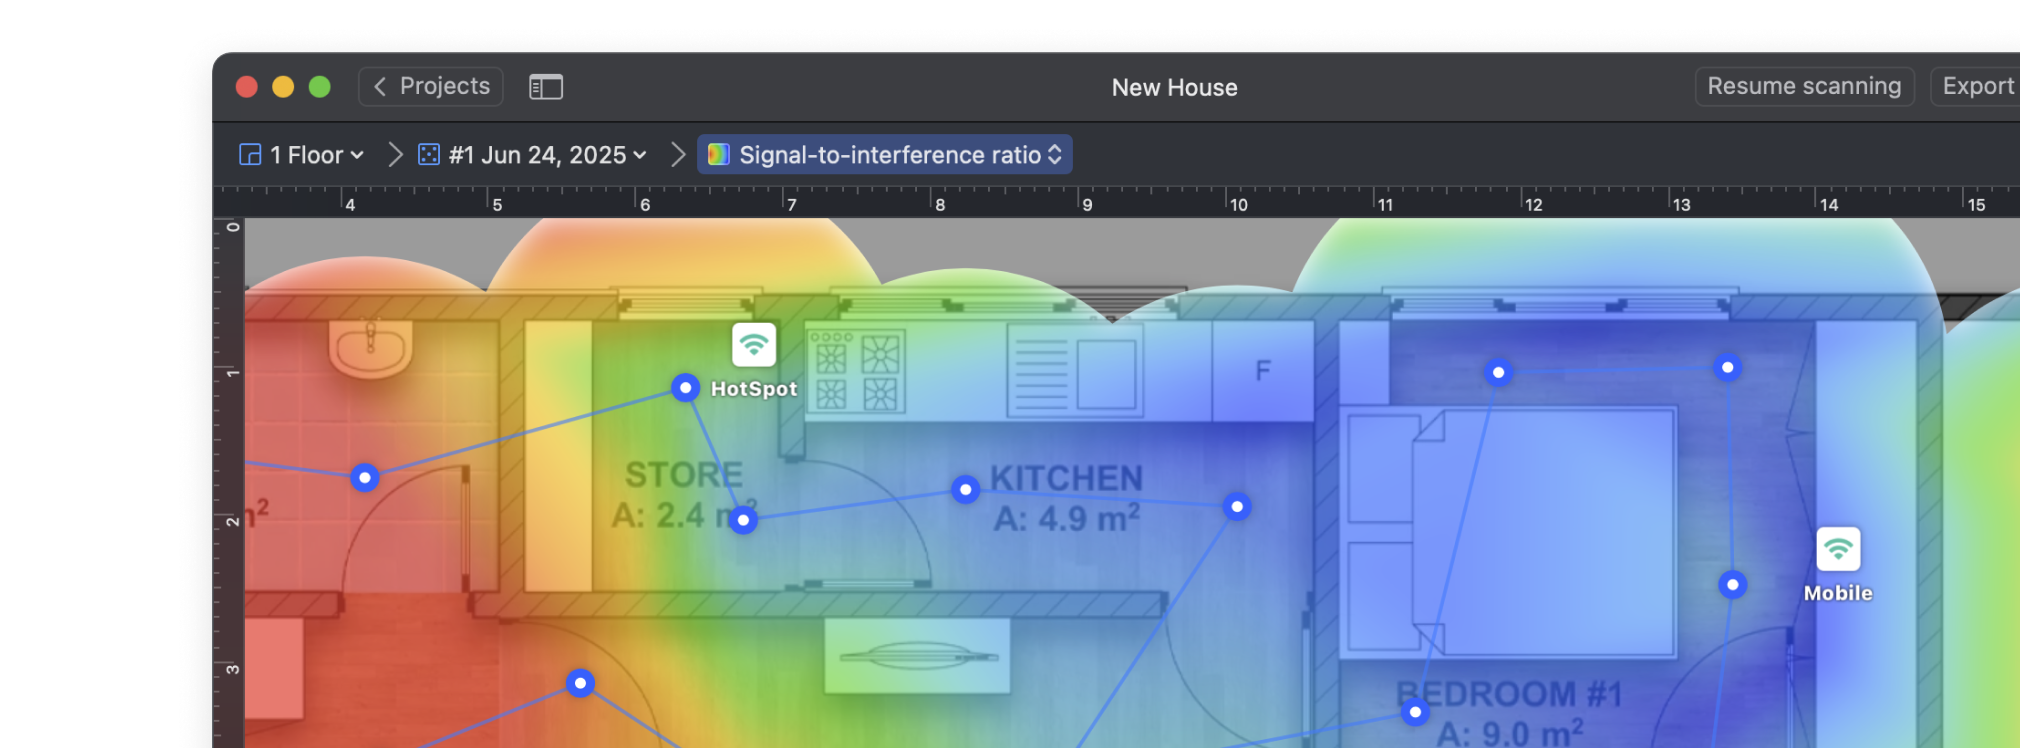
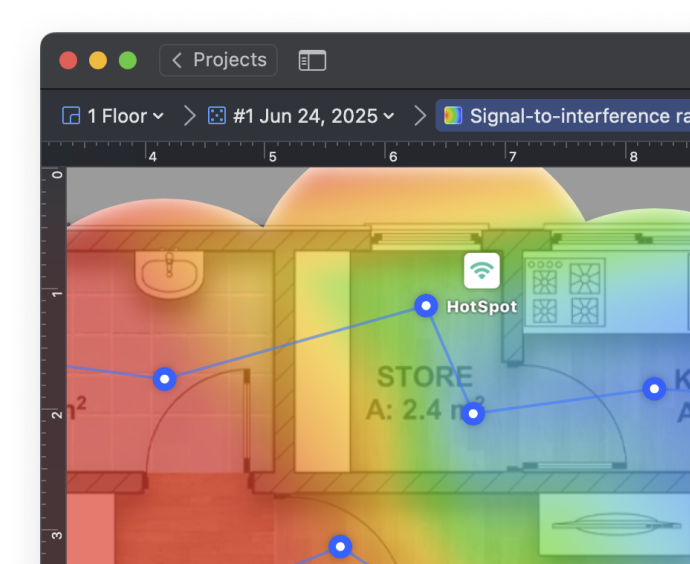
The Signal-to-Interference Ratio (SIR) heatmap is one of the most effective ways to detect overlapping WiFi channels. It visualizes how your signal competes with nearby networks using the same or adjacent channels. Warm colors — from red through yellow — show where your Wi-Fi dominates nearby signals, while light-cyan through deep-blue areas show where interference may cause trouble.
This heatmap makes it easy to detect where channel overlap is hurting your connection.
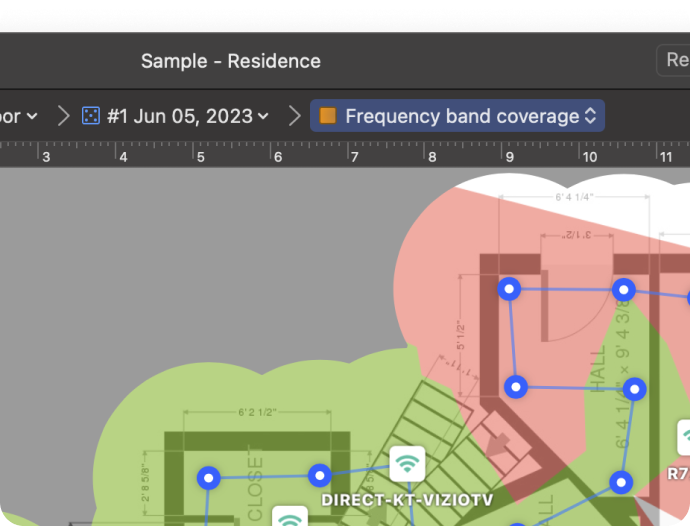
The Band Coverage heatmap displays where each frequency band — 2.4 GHz, 5 GHz, or 6 GHz — is available across your space. It helps you see which band delivers the best coverage in each room.
If one band shows weak or patchy coverage, switching to another band or selecting a channel from a less crowded band can improve performance.

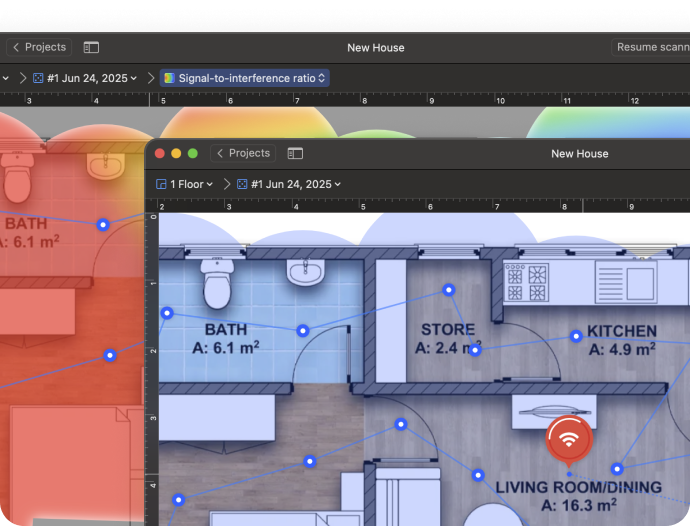
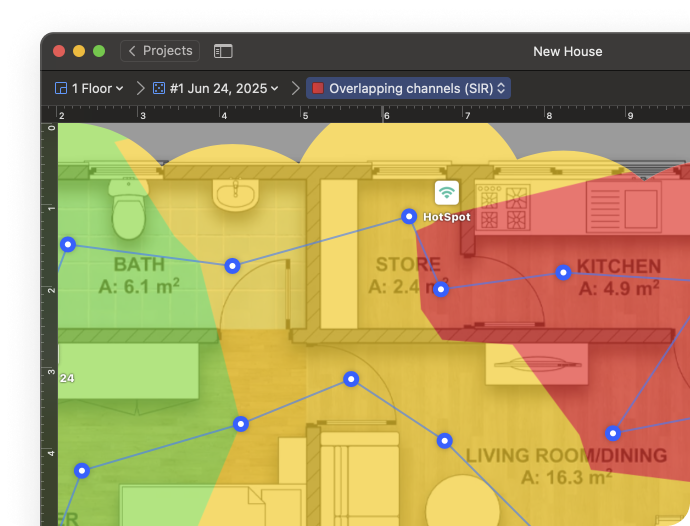
The Troubleshooting SIR heatmap shows where your WiFi signal is affected by overlapping channels, just like the standard Signal-to-Interference Ratio view. But here, you can set your own thresholds to define what counts as acceptable, warning, or critical SIR levels.
The map uses a simplified three-color scheme — green, yellow, and red — to highlight areas with clean signal, moderate interference, or severe overlap. This makes it much easier to focus on real problem zones.
Multiple types of visual heatmaps gives you a complete overview of your network coverage and interference to troubleshoot it.
On 2.4 GHz, only channels 1, 6, and 11 don’t overlap. Choose the least crowded one. If all are busy, go with the same channel as the strongest nearby network — full overlap lets devices follow CSMA/CA, taking turns without collision. Partial overlap causes interference, since signals are treated as noise.
The 5 GHz and 6 GHz bands offer more non-overlapping channels and are usually less crowded. To reduce interference, pick a channel with fewer nearby networks and lower signal strength (RSSI). In busy environments, using a narrower channel width (20 or 40 MHz) can also improve stability.
NetSpot’s Channel Scanner displays real-time channel usage across 2.4, 5, and 6 GHz, helping you identify congestion and choose the best WiFi channel for minimal interference.
More about Choosing the Right WiFi Channel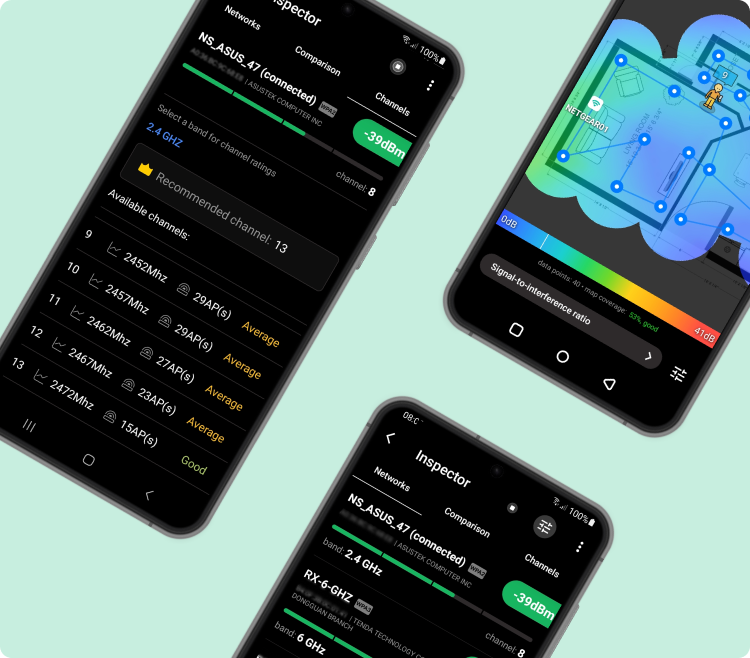
Scan nearby WiFi networks and find the clearest channels right from your Android device or Chromebook.
NetSpot shows you which channels are overloaded, how strong each signal is, and whether nearby networks are interfering with yours. You get instant insights into 2.4 GHz, 5 GHz, and even 6 GHz band usage — so you can switch to the best available channel and reduce interference.
NetSpot is the ultimate WiFi channel scanner, revealing crowded frequencies in seconds so you can lock onto the quietest lane and keep your network running at full speed.
Whether you're fixing slow speeds, setting up a new router, or optimizing coverage, NetSpot gives you the tools to get it right the first time.
In this section we'll do our best to answer your most frequent questions about WiFi channel scanning
A WiFi channel scanner detects all nearby wireless networks, shows what channels they use, and helps you avoid interference by picking a less crowded channel. Tools like NetSpot make this process visual and easy — even for beginners.
NetSpot analyzes surrounding networks and highlights which channel has the lowest interference. The built-in channel graphs and smart suggestions help you choose the clearest channel based on real-time data.
Yes, NetSpot supports WiFi 6E scanning on compatible devices. If your hardware can access the 6 GHz band, NetSpot will display all 6 GHz networks and their channel usage.
Use NetSpot’s SIR heatmaps and channel graphs to detect overlapping networks. Choose non-overlapping channels (like 1, 6, or 11 on 2.4 GHz) or switch to 5 GHz/6 GHz bands if available. Full overlap is better than partial if no clean channels remain.
It’s a good idea to run a channel scan every couple of weeks — especially if you live in an apartment or densely populated area. Nearby networks can change without notice, and routine scans help you catch interference early and keep your connection fast and stable.
Runs on a MacBook (macOS 11+) or any laptop (Windows 7/8/10/11) with a standard 802.11be/ax/ac/n/g/a/b wireless network adapter. Read more about the 802.11be support here.
Your projects are cross-platform and can be opened in NetSpot for macOS, Windows, and Android.