You can import zones and their snapshots from one project to another by merging projects. During merge NetSpot creates a new project with the zones you select, while the original projects stay unchanged.
It’s extremely convenient when you have an old survey you wish to redo, but don’t want to create all the zone configurations again. Or when working on the same area survey as a team on different computers.
Follow these steps to import data:
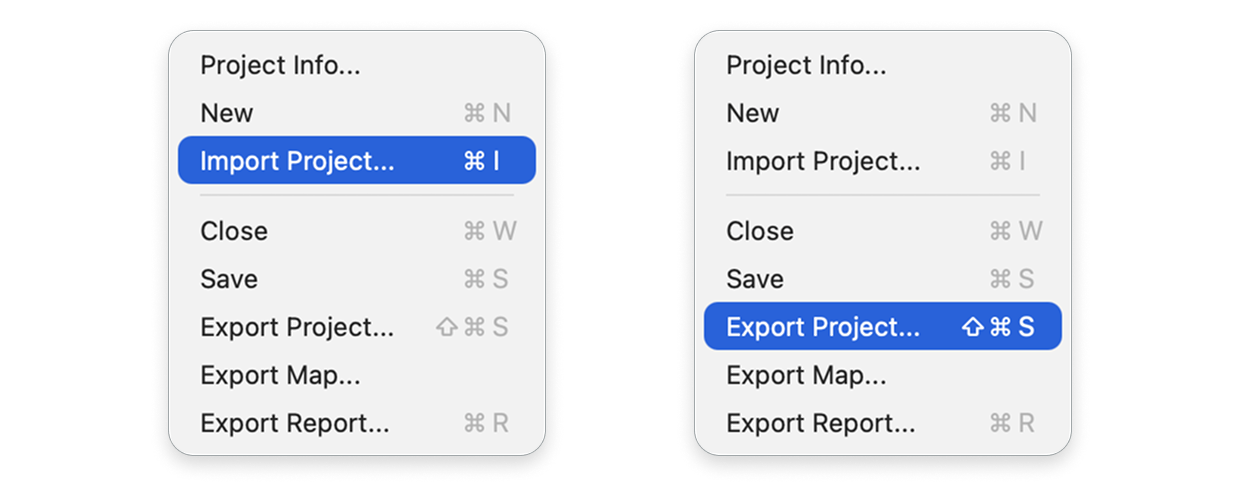
- If the project you want to import zones from is on another computer, export it there using File > Export Project… (a .netspu file will be saved), and then import it on your computer with File > Import Project…. NetSpot also supports .netspd files from older versions of the app.
- Once the import has been done, go to the project list (dashboard).
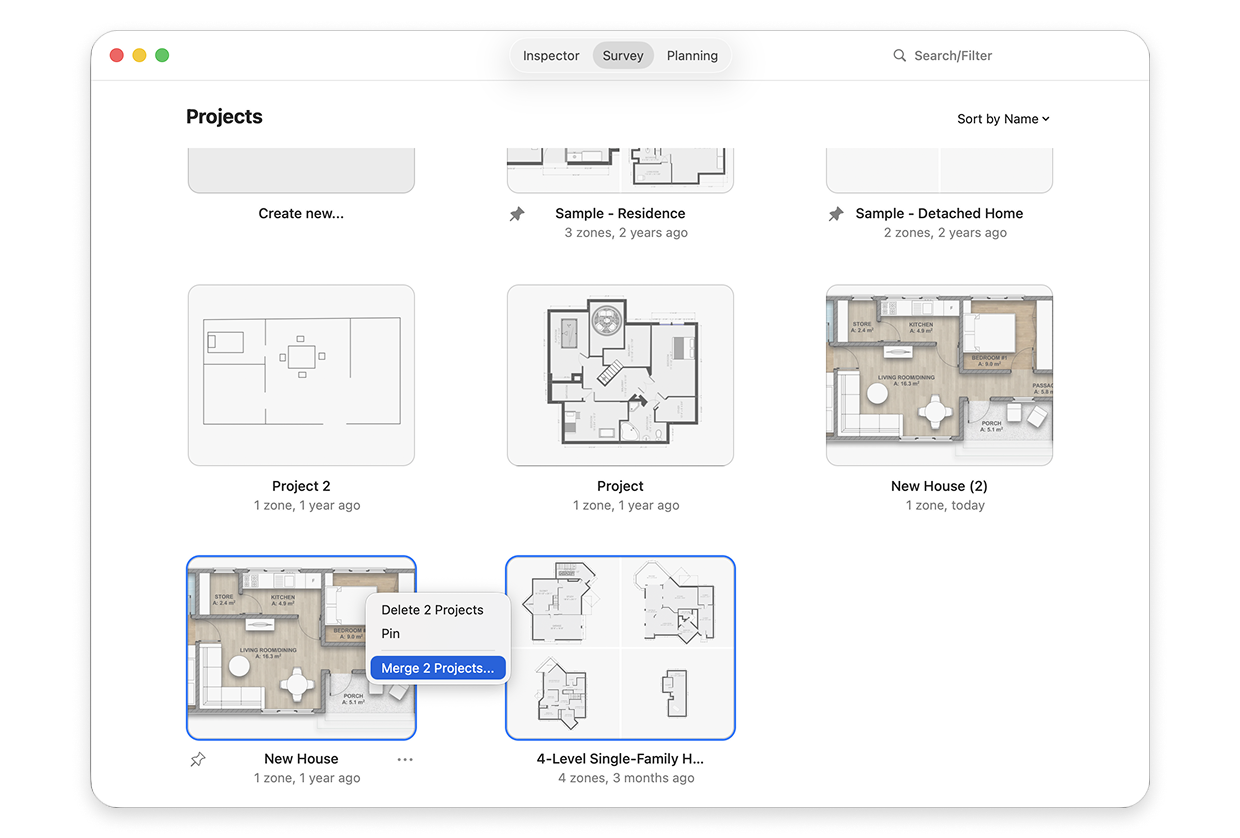
- Select all needed projects on NetSpot’s project landing screen (click on one project, then Shift-click, Command-click or Ctrl-click the others).
- Right-click any of the selected projects and click Merge X Projects… (X is the number of selected projects).
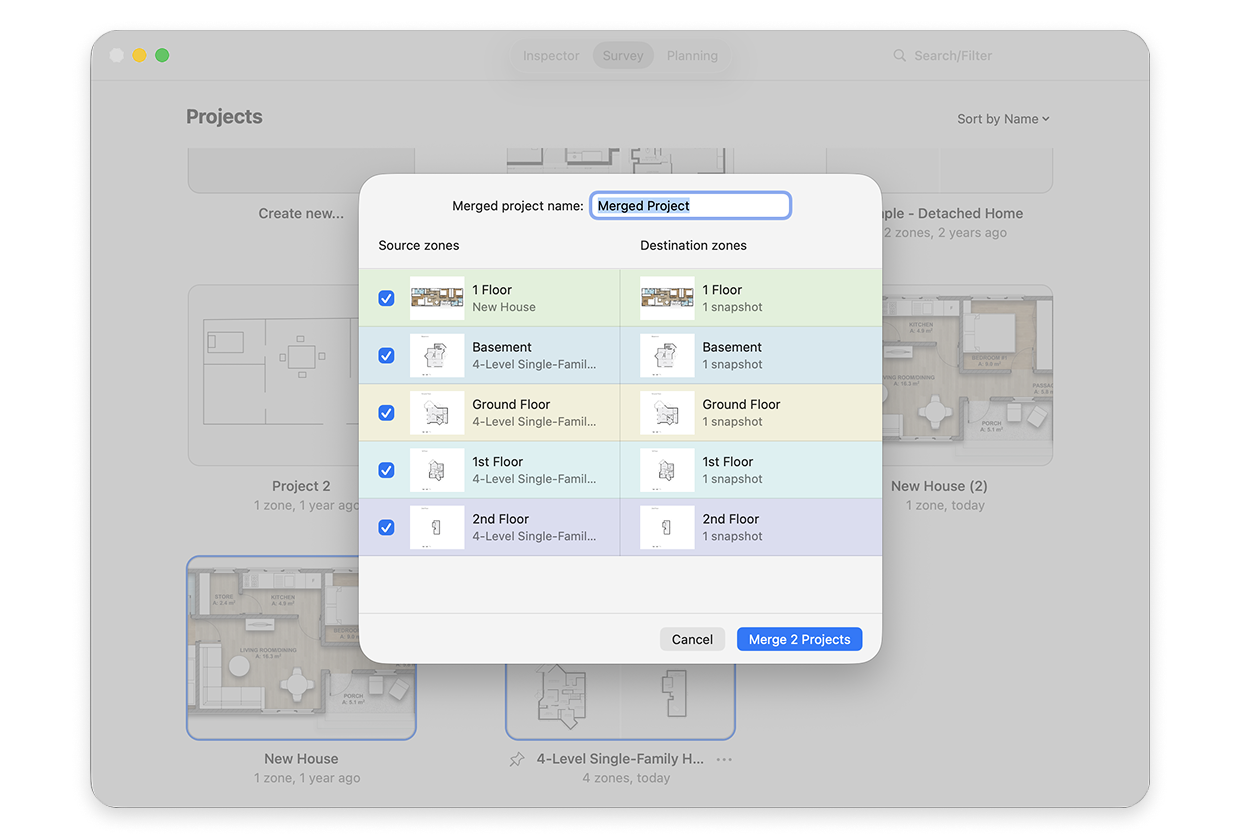
- Enter a name for the merged project in the Merged project name field, and select the zones to be merged.
Under Source zones on the left you can see the zones from the projects you are about to merge. The identical zones from projects from different computers are grouped together. Under Destination zones on the right you can see the zones the merged project will contain.
- If the selected projects contain identical zones, keep Save identical zones as one checked to combine them into one zone with all their snapshots. Uncheck it to keep them as separate zones (for example, Zone and Zone (2)).
- Click Merge X Projects.
- A new project with the selected zones will be created and will appear in your project list. The original projects stay unchanged.
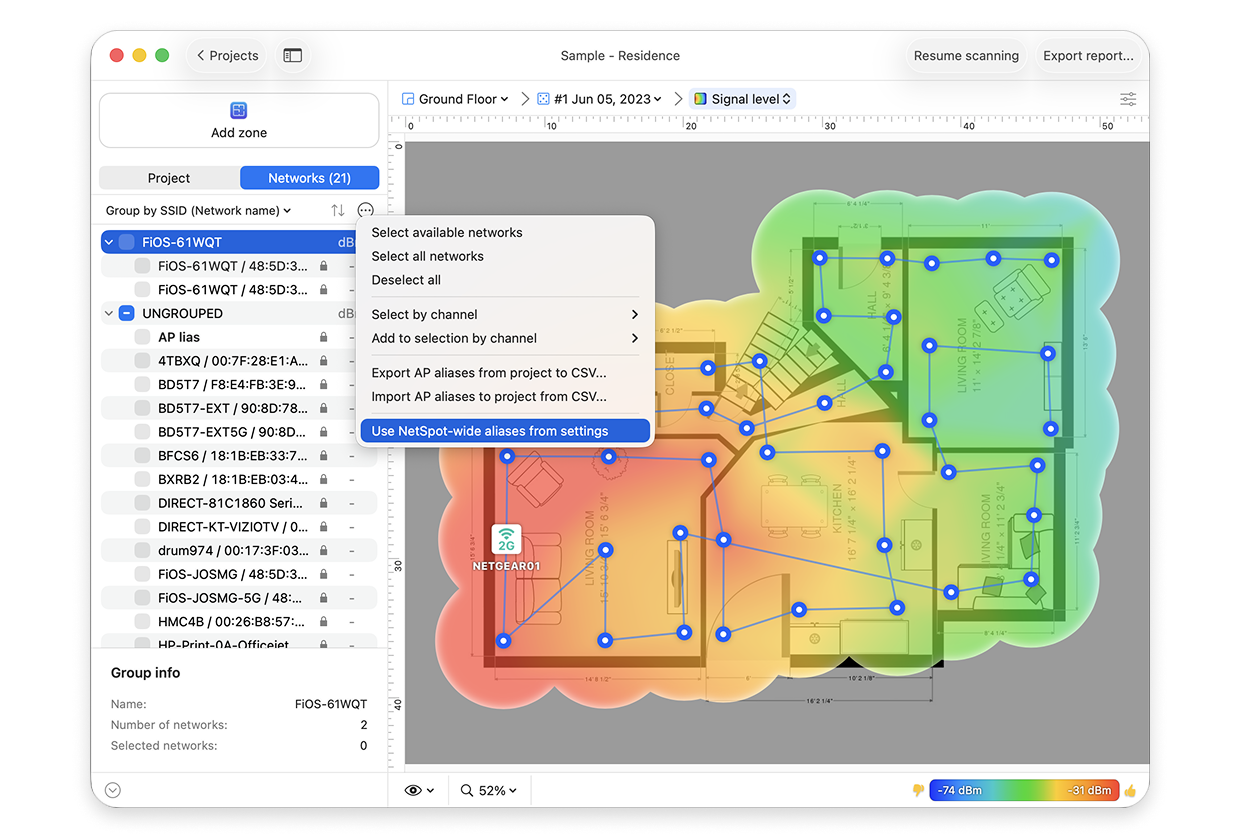
- Please note that the AP aliases are not transferred when you merge projects. To copy them from one project to another, open the project, switch to the Networks tab in the left sidebar, click the … button above the list and select Export AP aliases from project to CSV…. Then open the other project and select Import AP aliases to project from CSV… in the same menu.
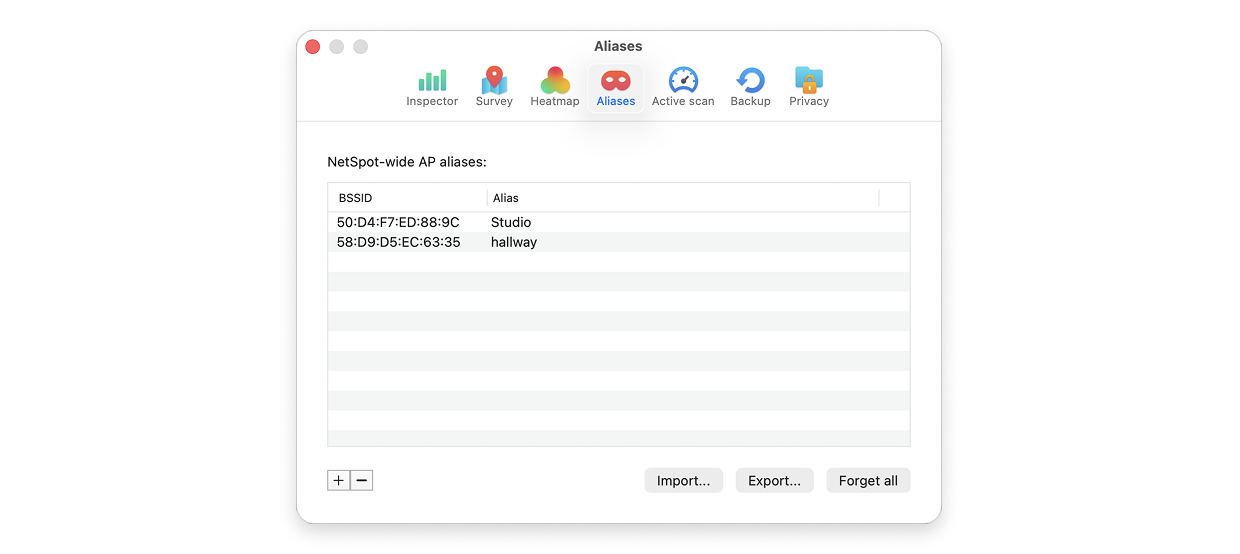
- You can also keep aliases for all your projects in one place. Open NetSpot settings, go to the Aliases tab and use the Import… and Export… buttons under the NetSpot-wide AP aliases list. These aliases are applied to access points in new scans.
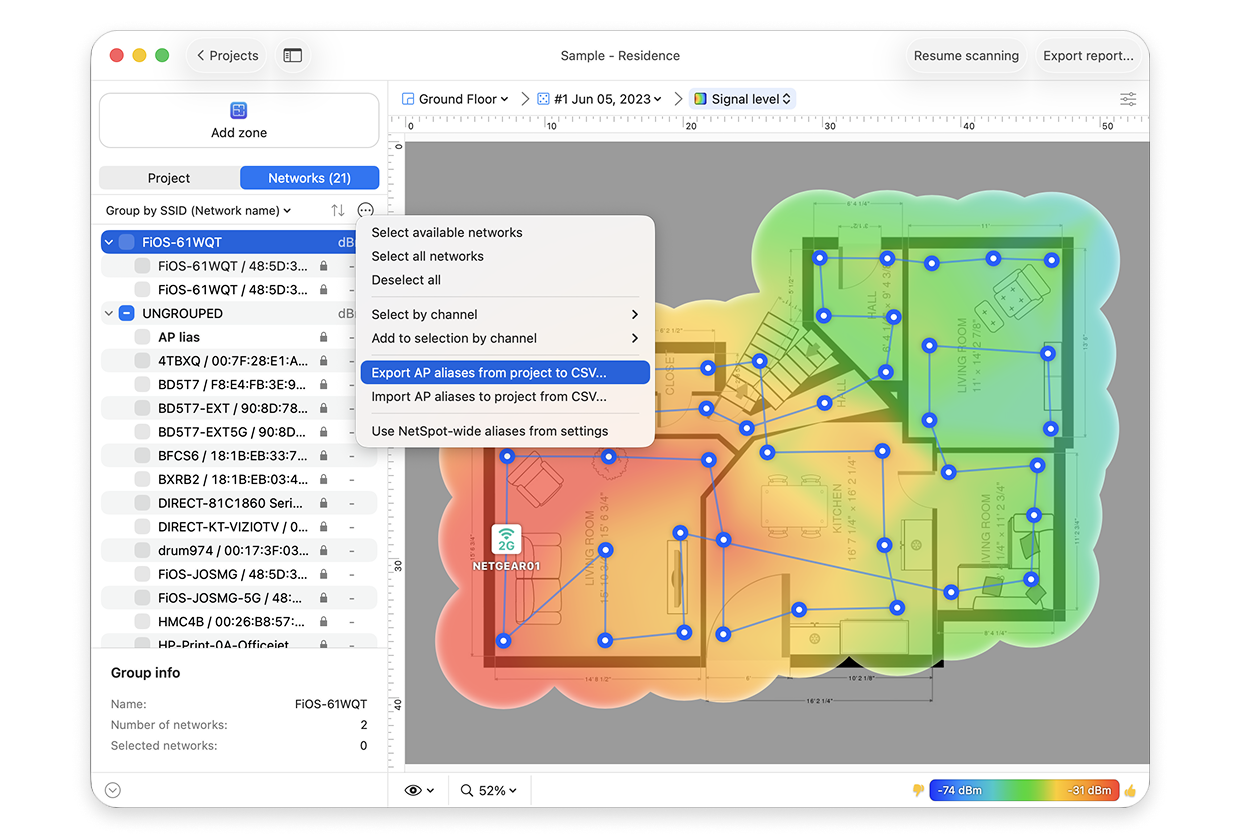
To apply them to a project you already have, select Use NetSpot-wide aliases from settings in the … menu on the Networks tab.