Snapshots are designed to help you monitor the changes that occur in your wireless network setup in a certain zone as the time passes. It is very practical to scan a zone, make adjustments to the utilized equipment and environment and then rescan the same zone in a new snapshot to see if the signal readings improved. There’s another essential application for zone snapshots within NetSpot: team work! Working on the same project as a team with multiple instances of NetSpot on Windows and/or Mac, you may assign different parts of the map to be surveyed by different people on your team. The resulting snapshots can be easily merged into one final project with all data points from all the surveyors.
Now let’s see what you can do with snapshots in your projects.
- To make your first snapshot: Zones are located in the left sidebar of NetSpot, while snapshots can be found atop your canvas area. Just click the currently active snapshot for the full list of the created snapshots to drop down. Your first snapshot is created automatically when you perform your first scan. It is automatically named according to the date of creation, e.g. “#1 Oct 11, 2024”.
- To add a new snapshot, manage or merge the existing ones: Сlick the snapshot name and select the appropriate option from the drop-down menu.
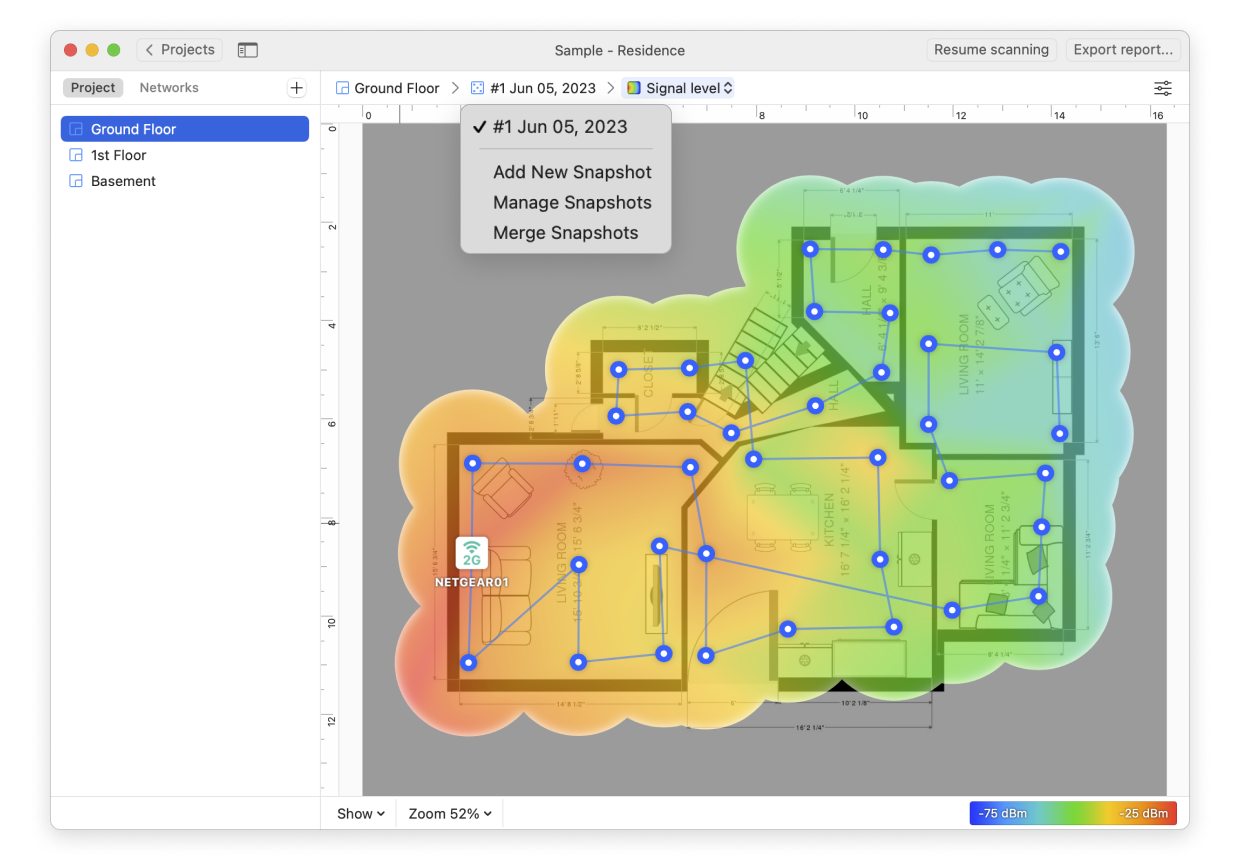
- When you select the Manage option from the menu, you can rename, duplicate, or delete a snapshot.
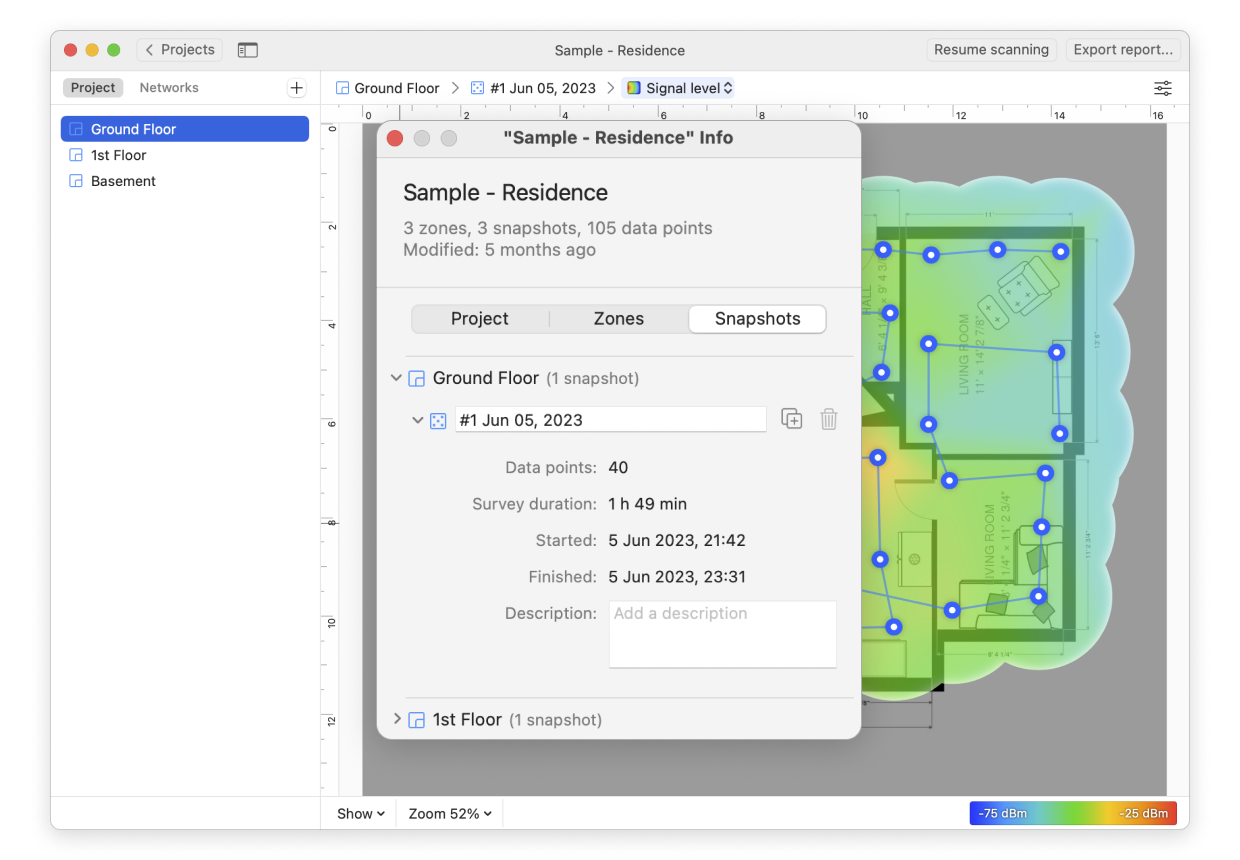
- To view or compare snapshots: Simply click on the name of each snapshot and you will be able to view all heatmaps associated with each scan.
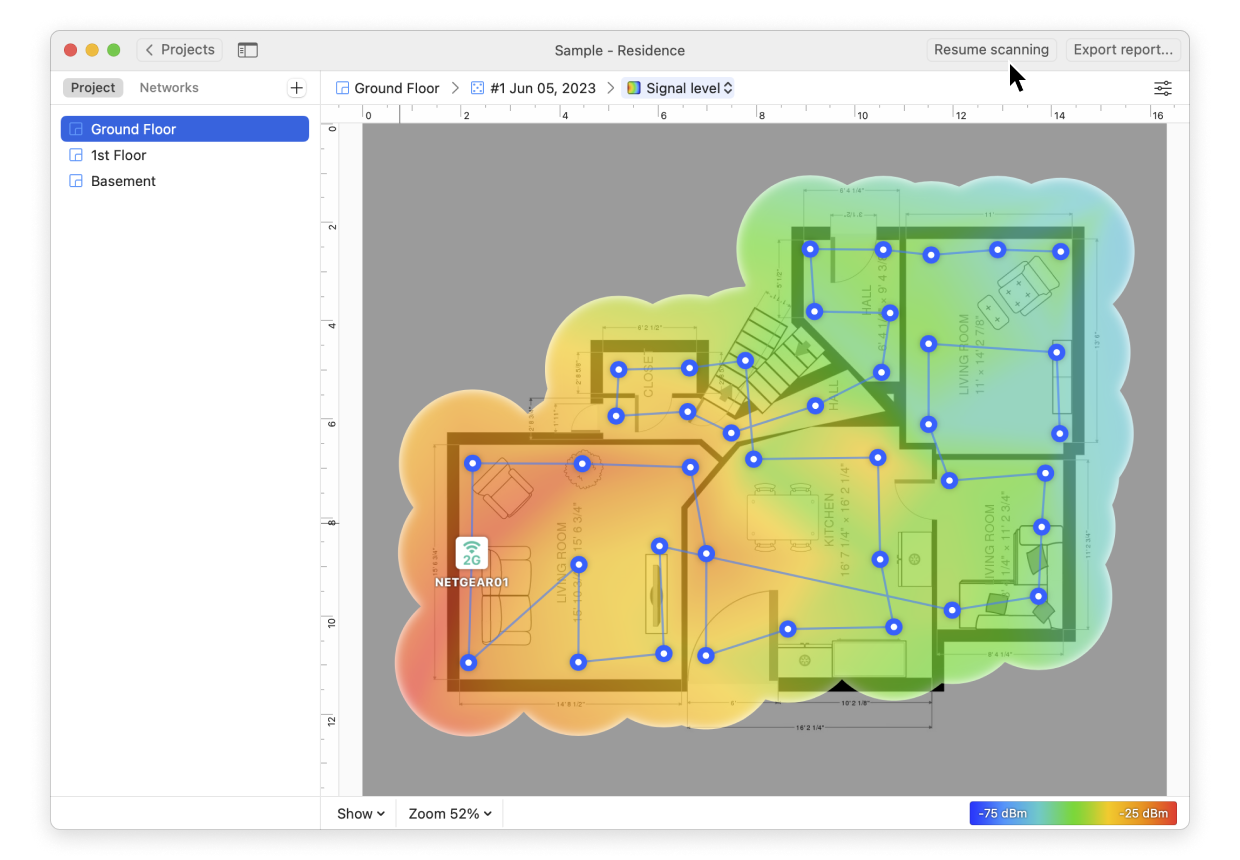
- To make changes to an existing snapshot use the Resume scanning button.
- To save zone snapshots: Snapshots are automatically saved with your Project, so simply go up to the menu bar and select File > Save.
Note: NetSpot Home allows you to create two snapshots per zone, NetSpot PRO — 50 snapshots per zone, and with NetSpot Enterprise you can have an unlimited number of snapshots in each zone.