NetSpot PRO and Enterprise users can add an alias to each AP shown on the map (floor plan). There are five ways you can add an AP alias. Note that the first three methods only affect future surveys or if you add new data points to an existing survey. If you need to add project-specific aliases to existing surveys that you have already conducted, use methods D or E.
Global vs. Project Aliases
There are 2 types of AP aliases in NetSpot: global (NetSpot-wide) and project-specific. Global aliases are stored and specified in NetSpot Preferences. Project-specific aliases are unique to a survey project file and are stored in that file. Global aliases are automatically applied to new surveys (assuming there’s an alias saved in Preferences for the specific MAC address of the AP) and are always applied in Inspector Mode.
Whenever a saved survey file is transferred from one computer to another, the project aliases are automatically transferred as well. In such a case it may happen that a survey has its own alias for a specific AP, while at the same time a global alias for that AP is already stored in Preferences on a different computer. The project-specific aliases saved in survey files are prioritized over global ones. However, you may force global aliases to apply to any existing survey by clicking ( ![]() ) at the top of the left panel in NetSpot (above the networks list) and selecting “Use NetSpot-wide aliases from settings”. To add or edit project-specific aliases, see methods D and E below.
) at the top of the left panel in NetSpot (above the networks list) and selecting “Use NetSpot-wide aliases from settings”. To add or edit project-specific aliases, see methods D and E below.

Method A: Add Global Aliases in Preferences
This method allows you to add/delete/edit global aliases from multiple projects/zones in one convenient place. If your APs are showing up in Inspector Mode, use Method C below for quicker entry.
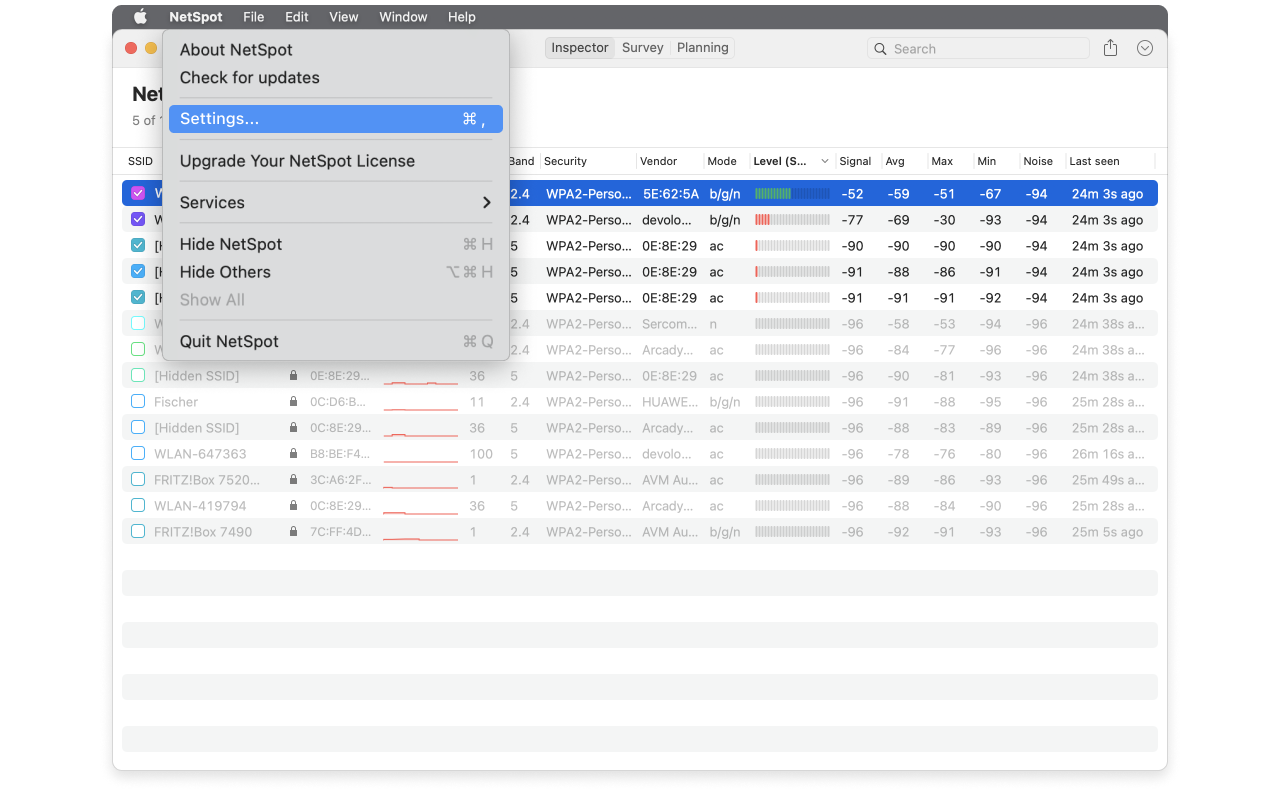
- Go to NetSpot > Settings… and select the Aliases tab.
- Click the plus (+) button on the lower left and type in the AP’s BSSID and Alias and then click Add Alias. (If you do not know the AP BSSID, you can hover over the AP name in Survey Mode, or consult the BSSID column in Inspector Mode.)
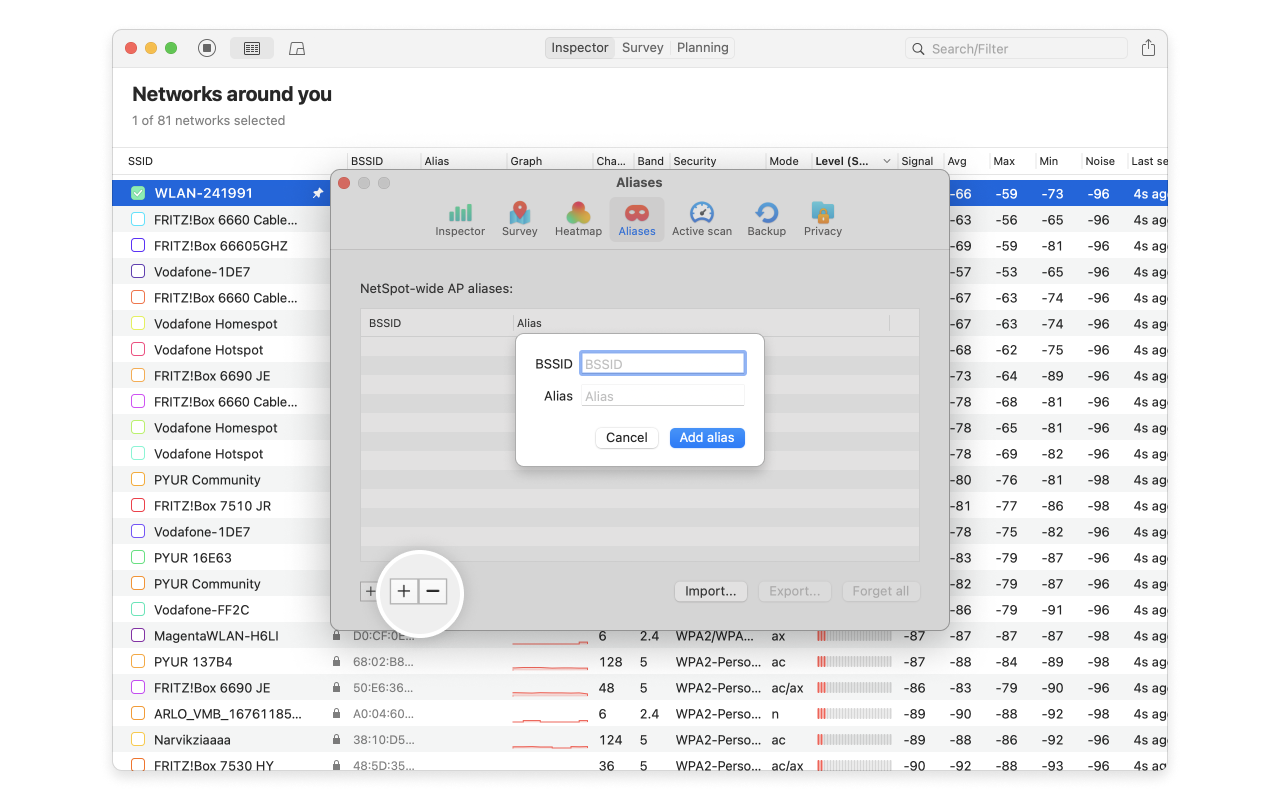
- Note that if you make an error in the BSSID format, it will not allow you to add the alias.
- To edit a BSSID or alias in the list, double-click on the text you wish to change.
- To delete an alias, click on the alias in the list to highlight it, then click the minus (-) button on the lower left.
- Any new surveys you conduct will now list the AP aliases. This will not affect the old data points in already existing surveys, however if you add a new data point to an old survey, the new alias settings will be applied to it. Use Method D below for already existing finalized surveys.
Note: The new aliases will show up immediately in Inspector Mode (in the column labeled Alias).
Method B: Bulk Add Global Aliases from a CSV file
If you have a long list of APs and aliases, you can import them from a CSV (comma separated values) file.
- Create a spreadsheet with the BSSIDs in column 1 and the Aliases in column 2. Example:
C8:3A:35:55:81:58,conference room
DC:3A:5E:7F:94:B5,hallway - Save your spreadsheet in the CSV (.csv) format.
- Go to NetSpot > Settings… and click on the Aliases tab.
- Click the Import… button, select your CSV file, and click Open. The aliases should immediately appear on the list.
- Any new surveys you conduct will now list the AP aliases. This will not affect the old data points in already existing surveys, however if you add a new data point to an old survey, the new alias settings will be applied to it. Use Method D below for already existing finalized surveys.
- If you later wish to export this list, click Export…, enter a desired file name, select a file location, and then click Export.
Method C: Add Global Aliases in Inspector Mode
This method only works if you are in the vicinity of the APs you wish to rename and they are showing up in Inspector Mode. This is a quicker way of adding global aliases to the list of aliases in Settings, without having to type in the BSSID manually.
Note: make sure the Alias column is shown, by enabling it in the Header menu.
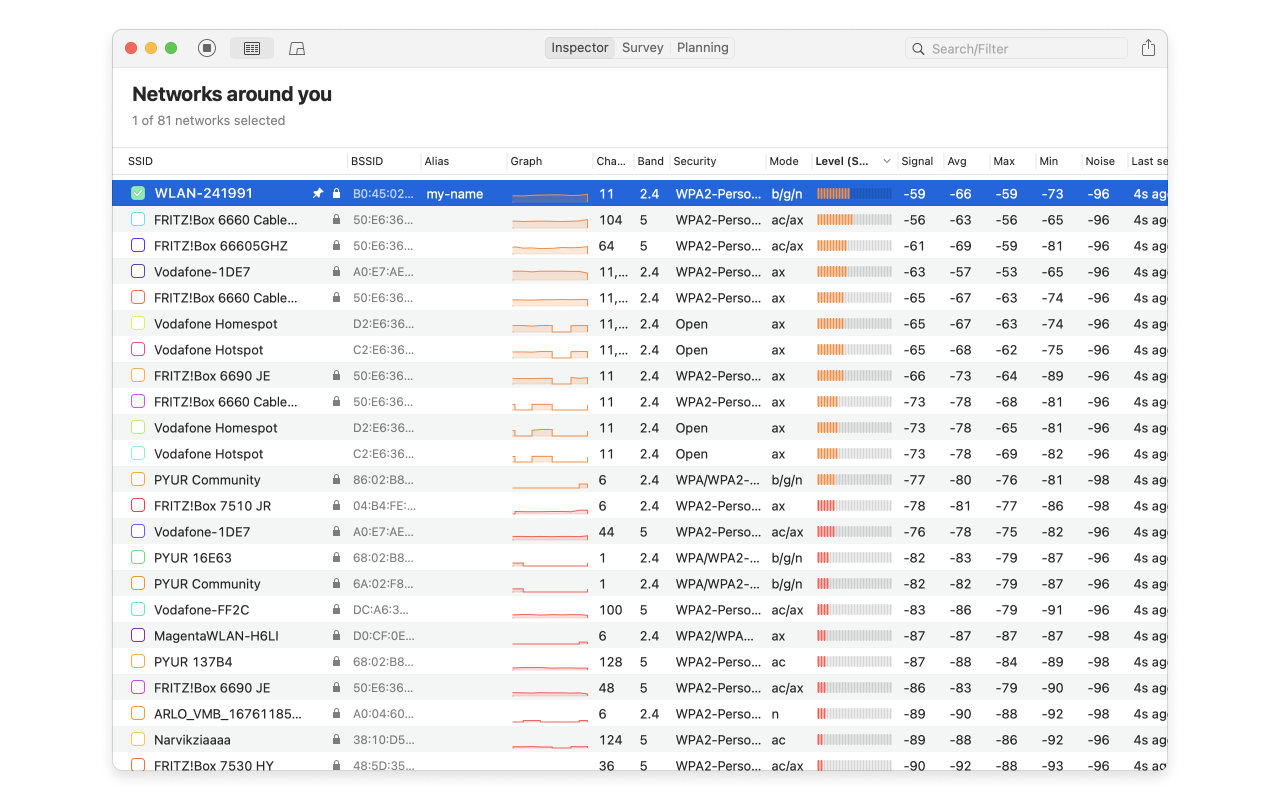
- In Inspector Mode, double-click on the “Alias” column next to the AP you wish to rename if you are working on Mac, while on Windows you’ll need to right-click on the network name > Add AP alias.
- Type in your alias name and press Enter. Continue adding aliases to each AP as needed.
- Any new surveys you conduct will now list the AP aliases. This will not affect the old data points in already existing surveys, however if you add a new data point to an old survey, the new alias settings will be applied to it. Use Method D below for already existing finalized surveys.
- To edit an alias, double-click on the name on Mac, or right-click on the alias > Edit AP alias on Windows, and edit the text.
- To delete an alias, double-click on the name and delete the text on Mac, or right-click on it and select Remove AP alias on Windows.
Method D: Adding Project-Specific Aliases
Aliases added using this method are project-specific for NetSpot for macOS and Windows. They will not show up in the global list of aliases in Settings, or in Inspector Mode.
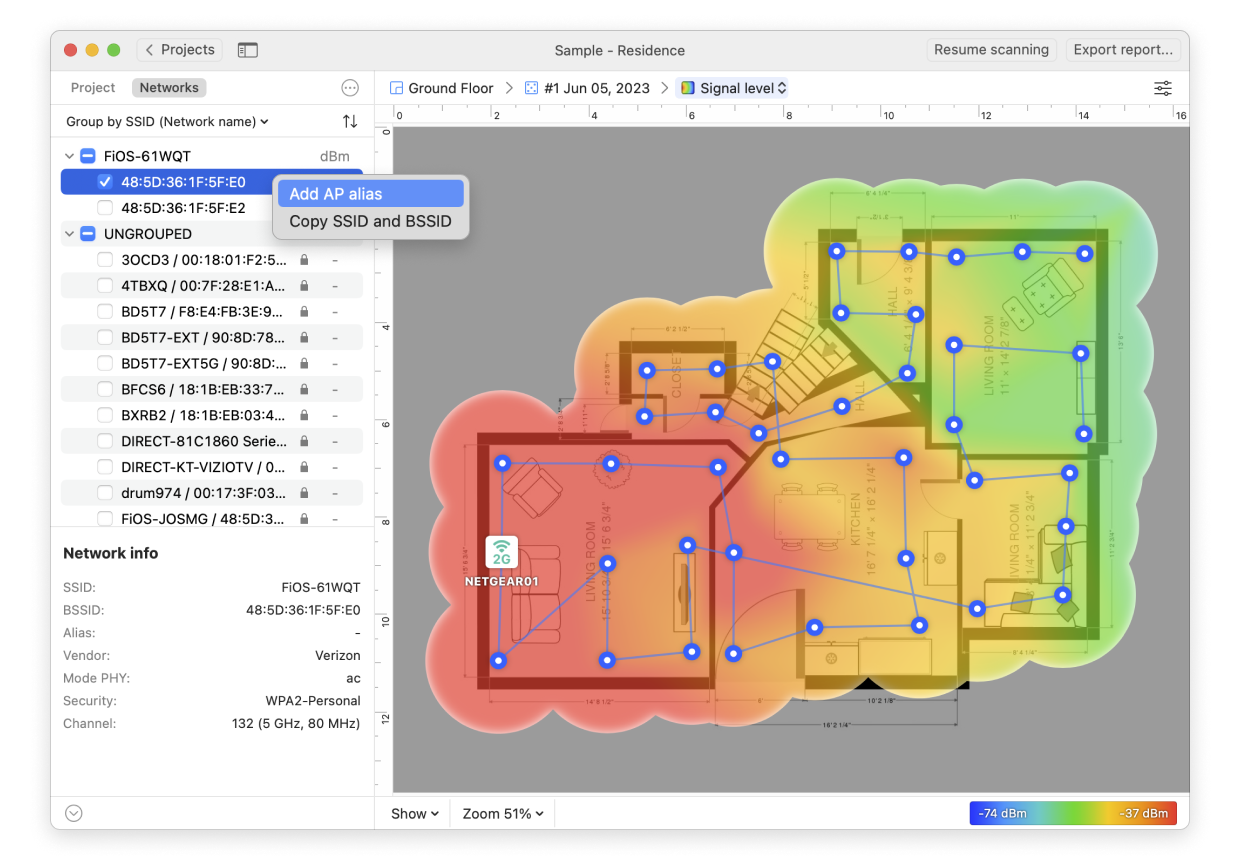
- On the left-hand sidebar in Survey Mode, right-click (secondary click) on the SSID of the AP you wish to make changes to.
- Select Add AP alias, type in the new name and press Enter/Return.
- Continue with each AP until you are done adding aliases.
- Your new names should now show up on the map.
- Right-click (secondary click) on a name again to edit an alias, or to remove it entirely and go back to the original AP name.
Method E: Importing a CSV with AP aliases directly into a project
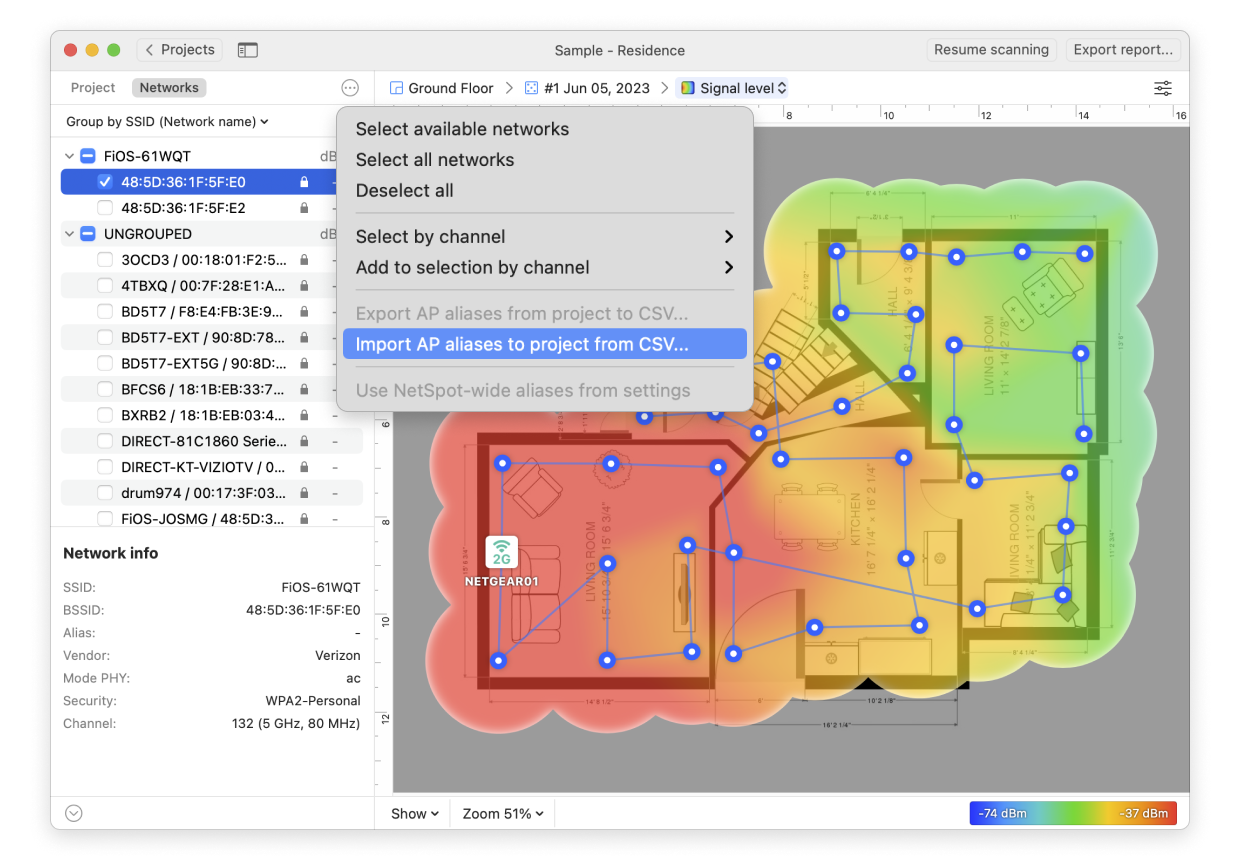
- When inside the project you would like to import AP aliases to from a CSV file click and select “Import AP aliases to project from CSV”.
- Select your CSV file, and click Open. The aliases should immediately appear on the list.
- This will not affect the old data points in already existing surveys, however if you add a new data point to an old survey, the new alias settings will be applied to it.
- If you later wish to export this list, click “Export AP aliases from project to CSV”, enter a desired file name, select the location to save the file. Then click Export.