If for some reason you are not satisfied with the map you have drawn or uploaded, you can always delete it.
If you haven’t started scanning yet (for example, you are still drawing your map in the Build Layout editor or scaling the uploaded map on the Calibration screen), you can cancel the zone setup. If you have moved on to the Data point screen you can easily go back or cancel the zone setup.
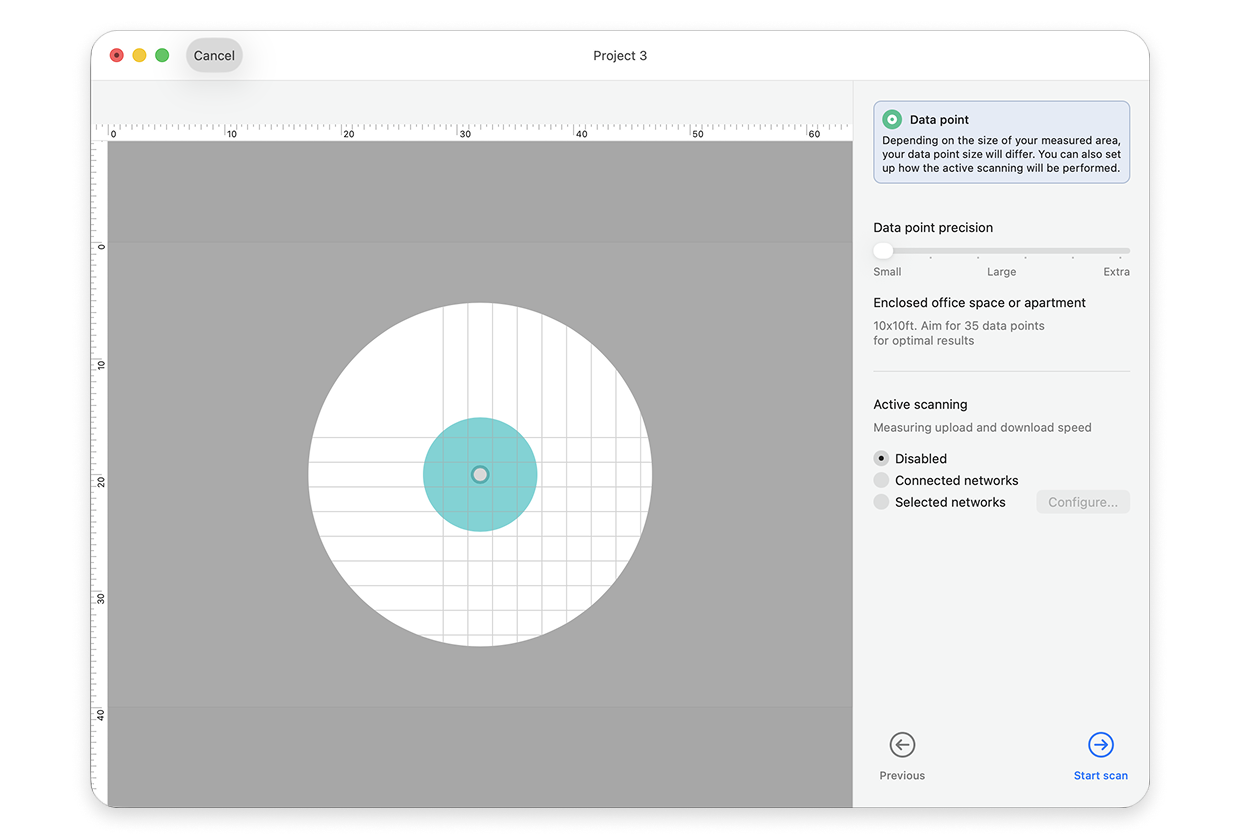
On the Data point screen, click Previous at the bottom of the right panel to return to the Build Layout or Calibration screen. To discard the new zone and its map completely, click Cancel in the upper-left corner of the window, and then click Close in the “You have some unsaved progress” dialog.

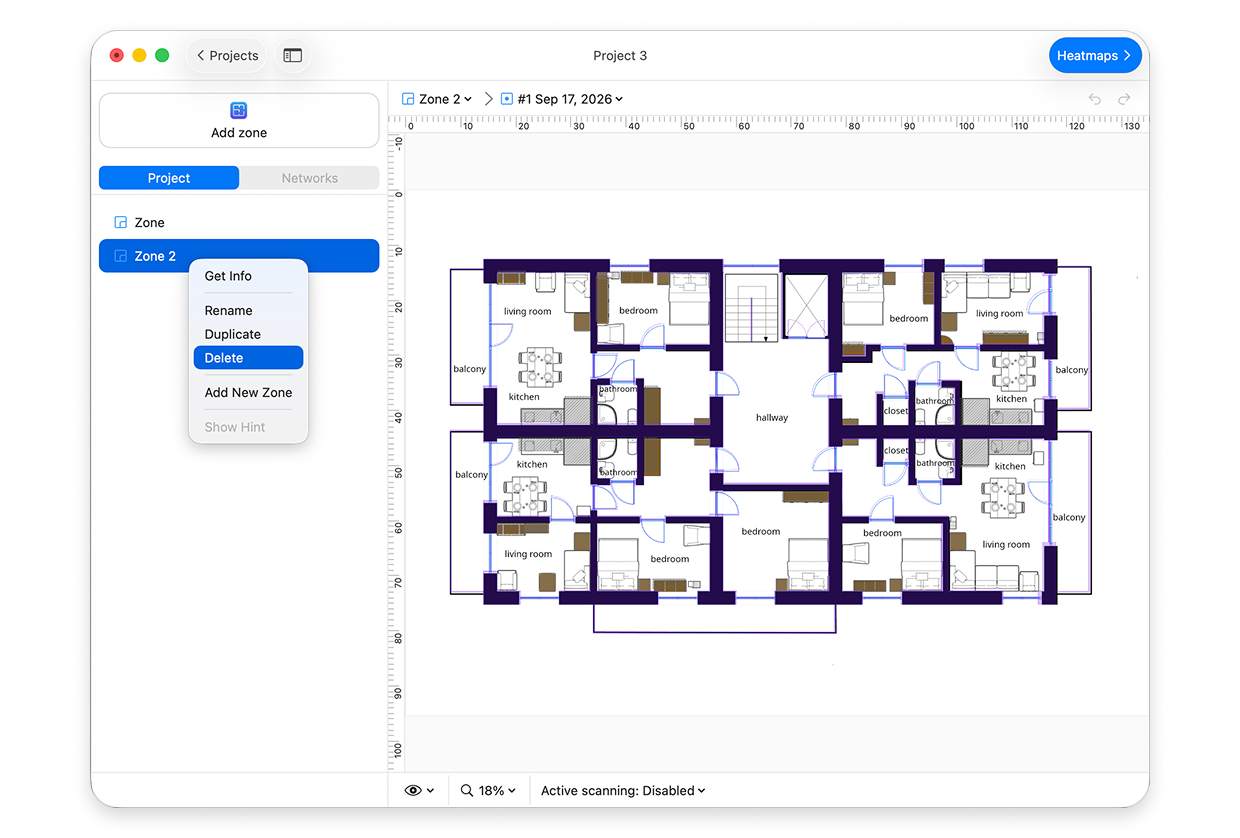
If you are at the point where you are actively scanning a zone, you will need to right-click the zone name in the left sidebar, select Delete, and then click Remove to confirm.
You can also click the zone name above the map and choose
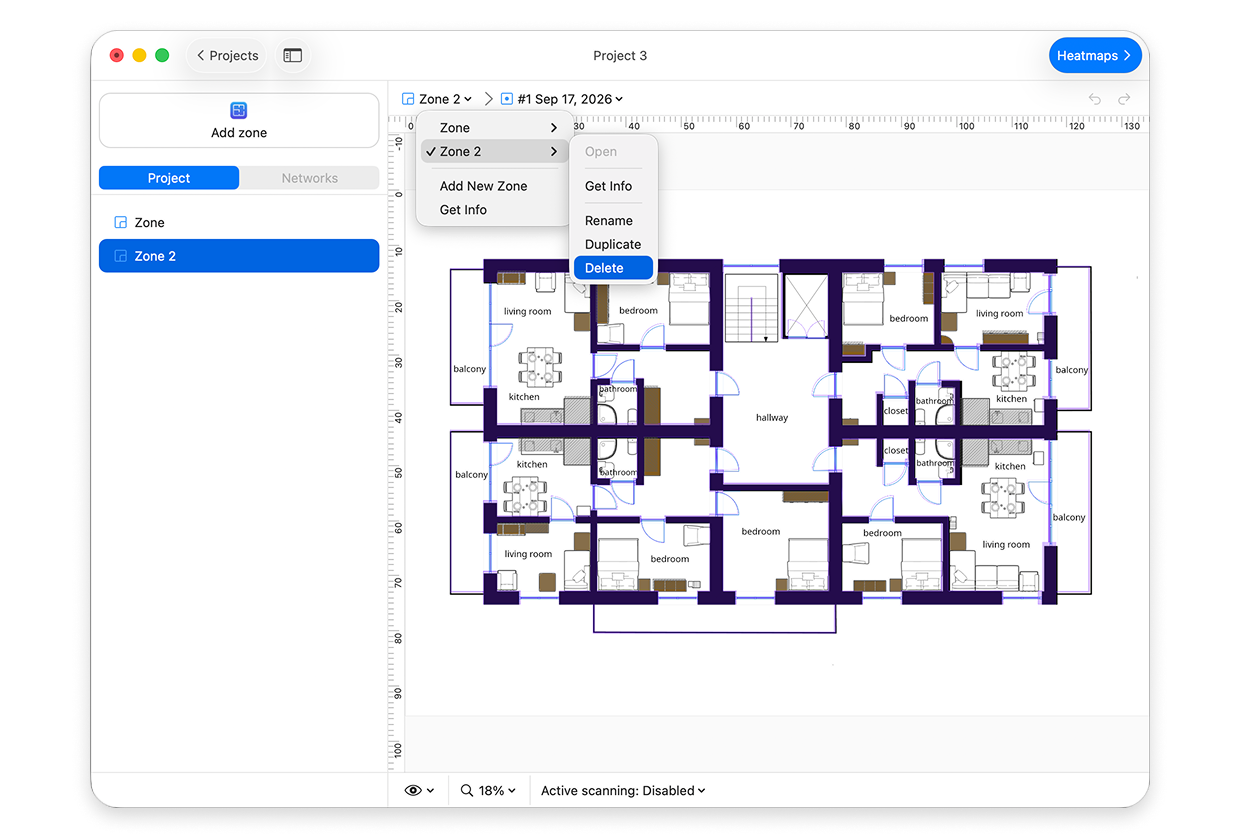
This will delete both the map and the zone settings you have created and you will need to start the zone creation from scratch by uploading or drawing a new map.
Note that you cannot delete the only zone in a project: the Delete option is unavailable until you add another zone.